Kiosk Time: A Raspberry Pi and Touch Display Story
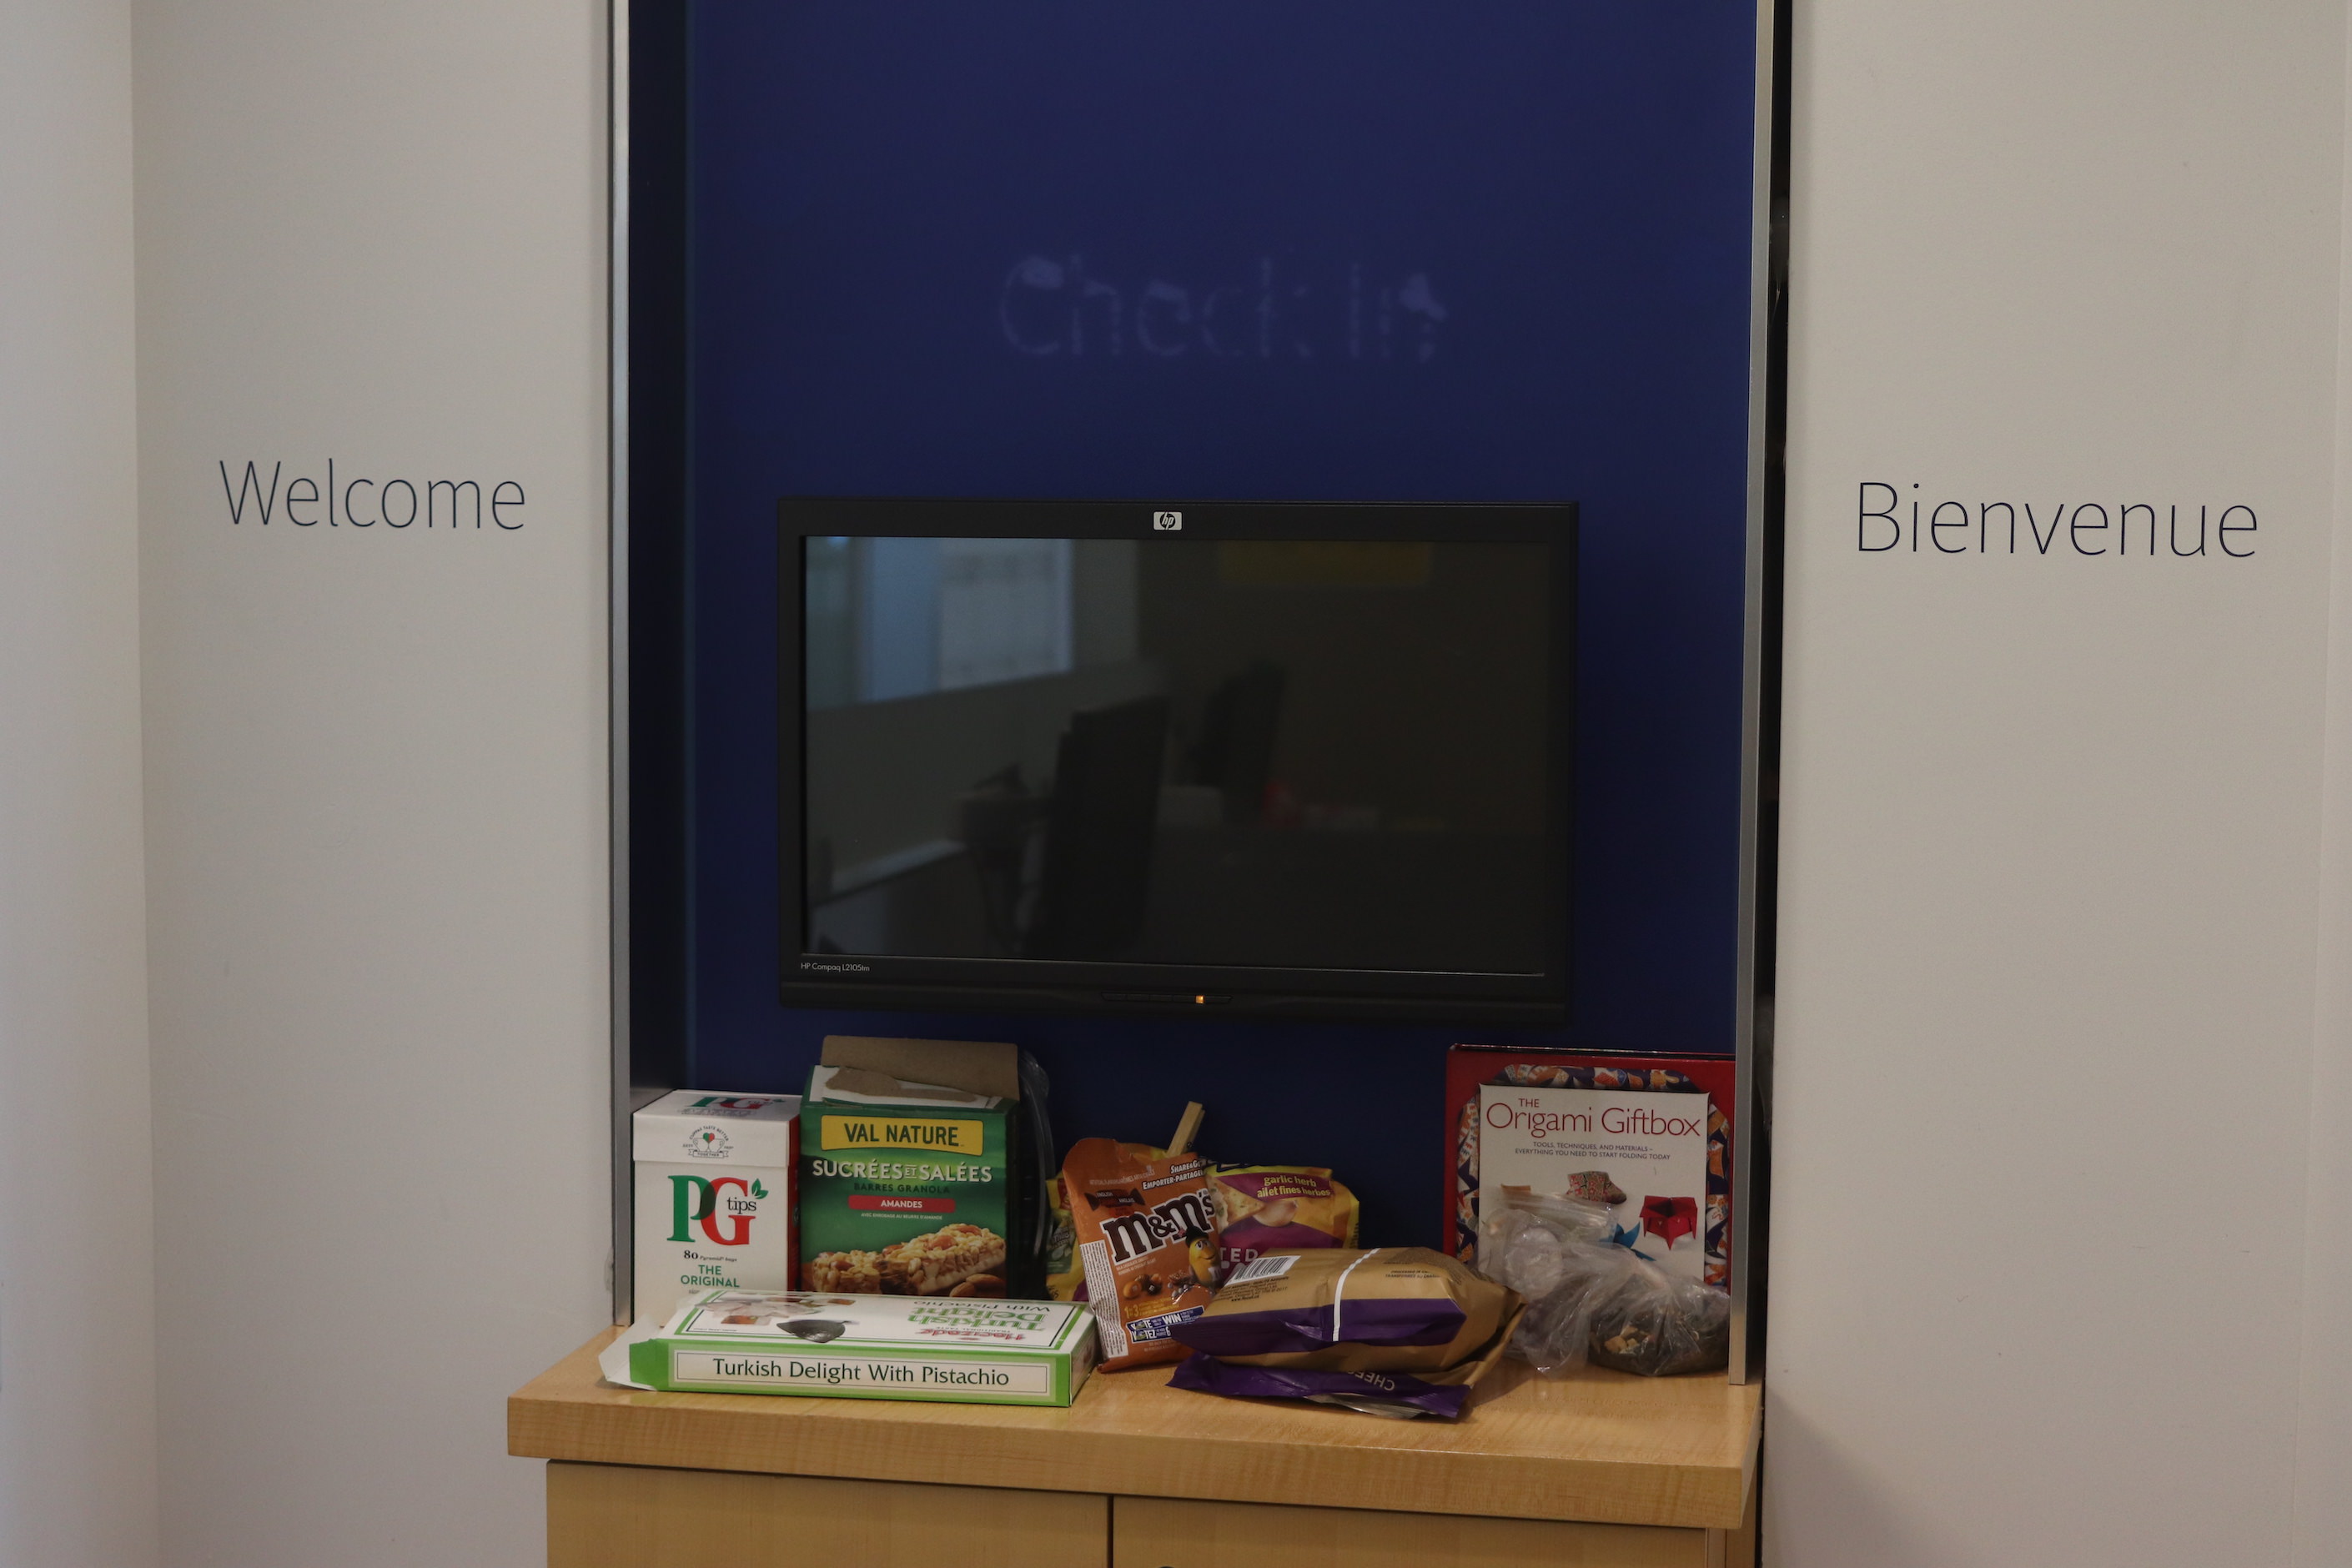
The first day I started at RBC, I realized a dormant monitor attached to the wall at the entrance of our office space. The 21.5-inch HP display was the only intact remnant of what once was the reception area for the 27th floor—it stood below a “Check-In” sign that was unsuccesfully removed, and above a cabinet that now housed a Nespresso coffee machine for some reason.
We used it as a shrine. We put our sweet and savoury offerings beneath it, as a way to lure our colleagues into our nest.
But the display just taunted me, sitting there and doing nothing. I had to see what was up with it.
The Tech of It
The first point of curiosity was the resolution of the display. It did look dusty and old, and I suspected it would be lower than 1920×1080, which would make it an unworthy tinker-toy.
Thankfully, the model number was printed right on the front bezel, making research practically nontrivial.
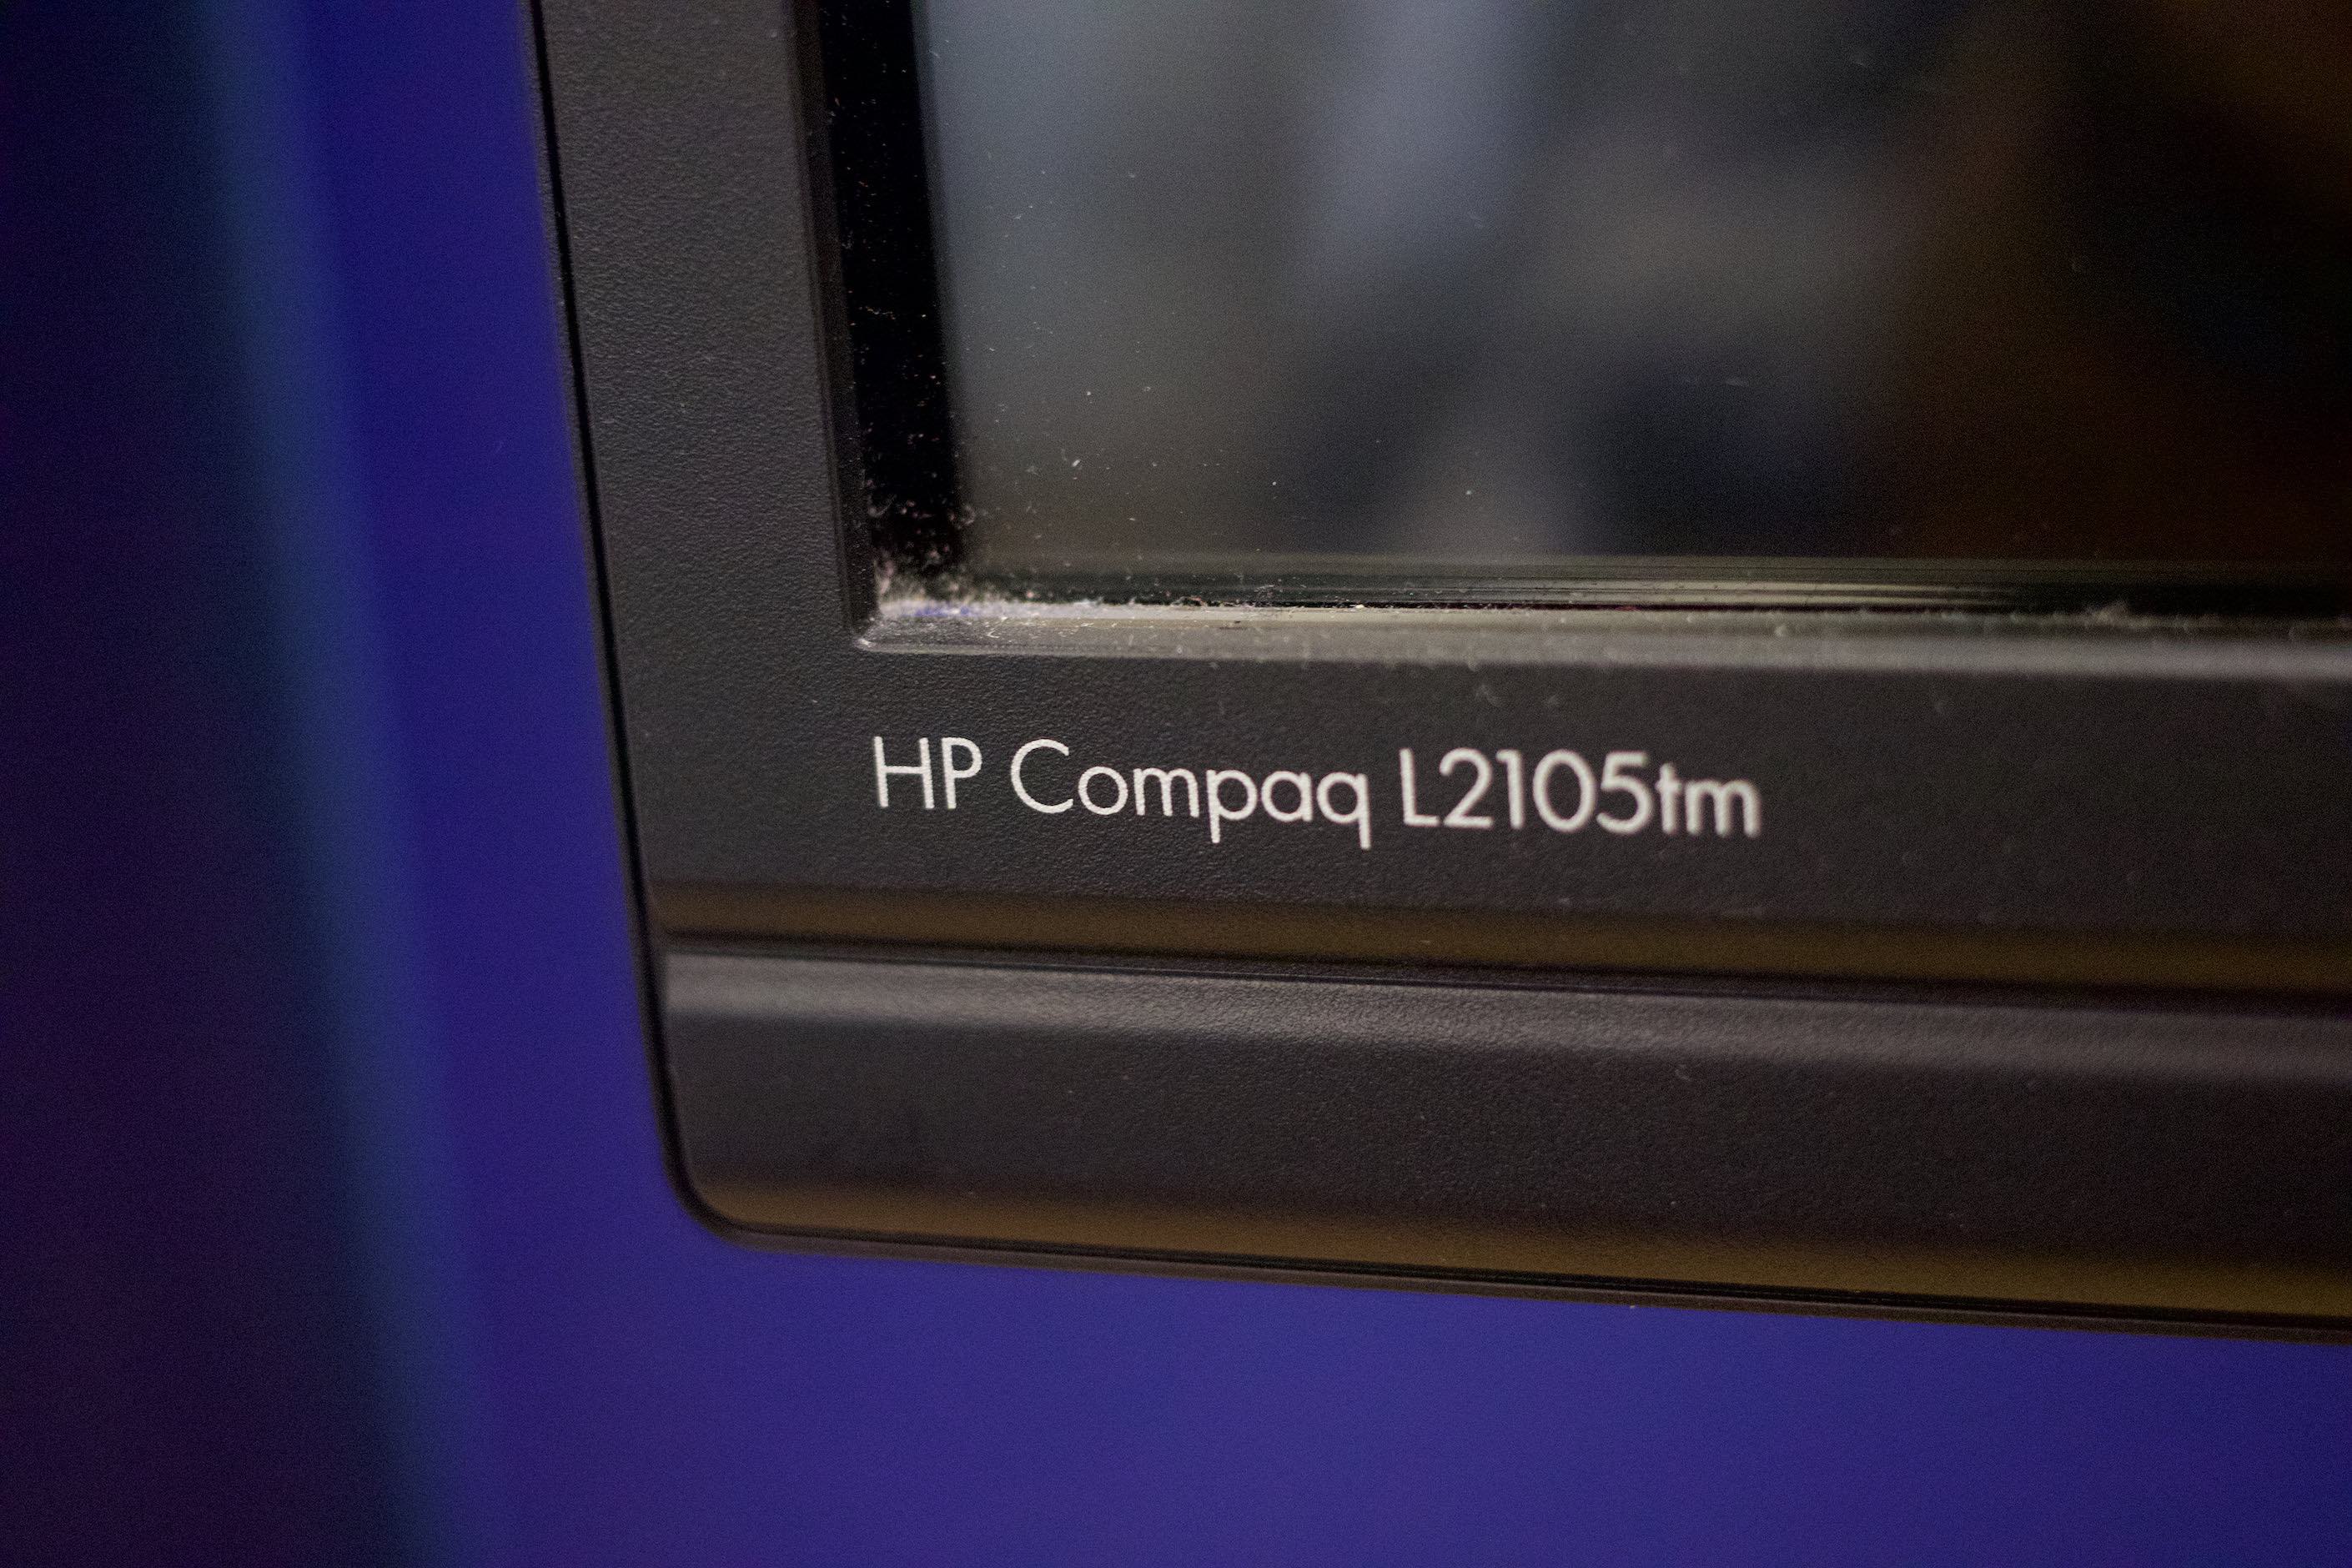
Turns out, it was a 1080p display—with touch capabilities. And Linux supported it out of the box.
🤯
Connectivity
Next up: Hooking it up to… something.
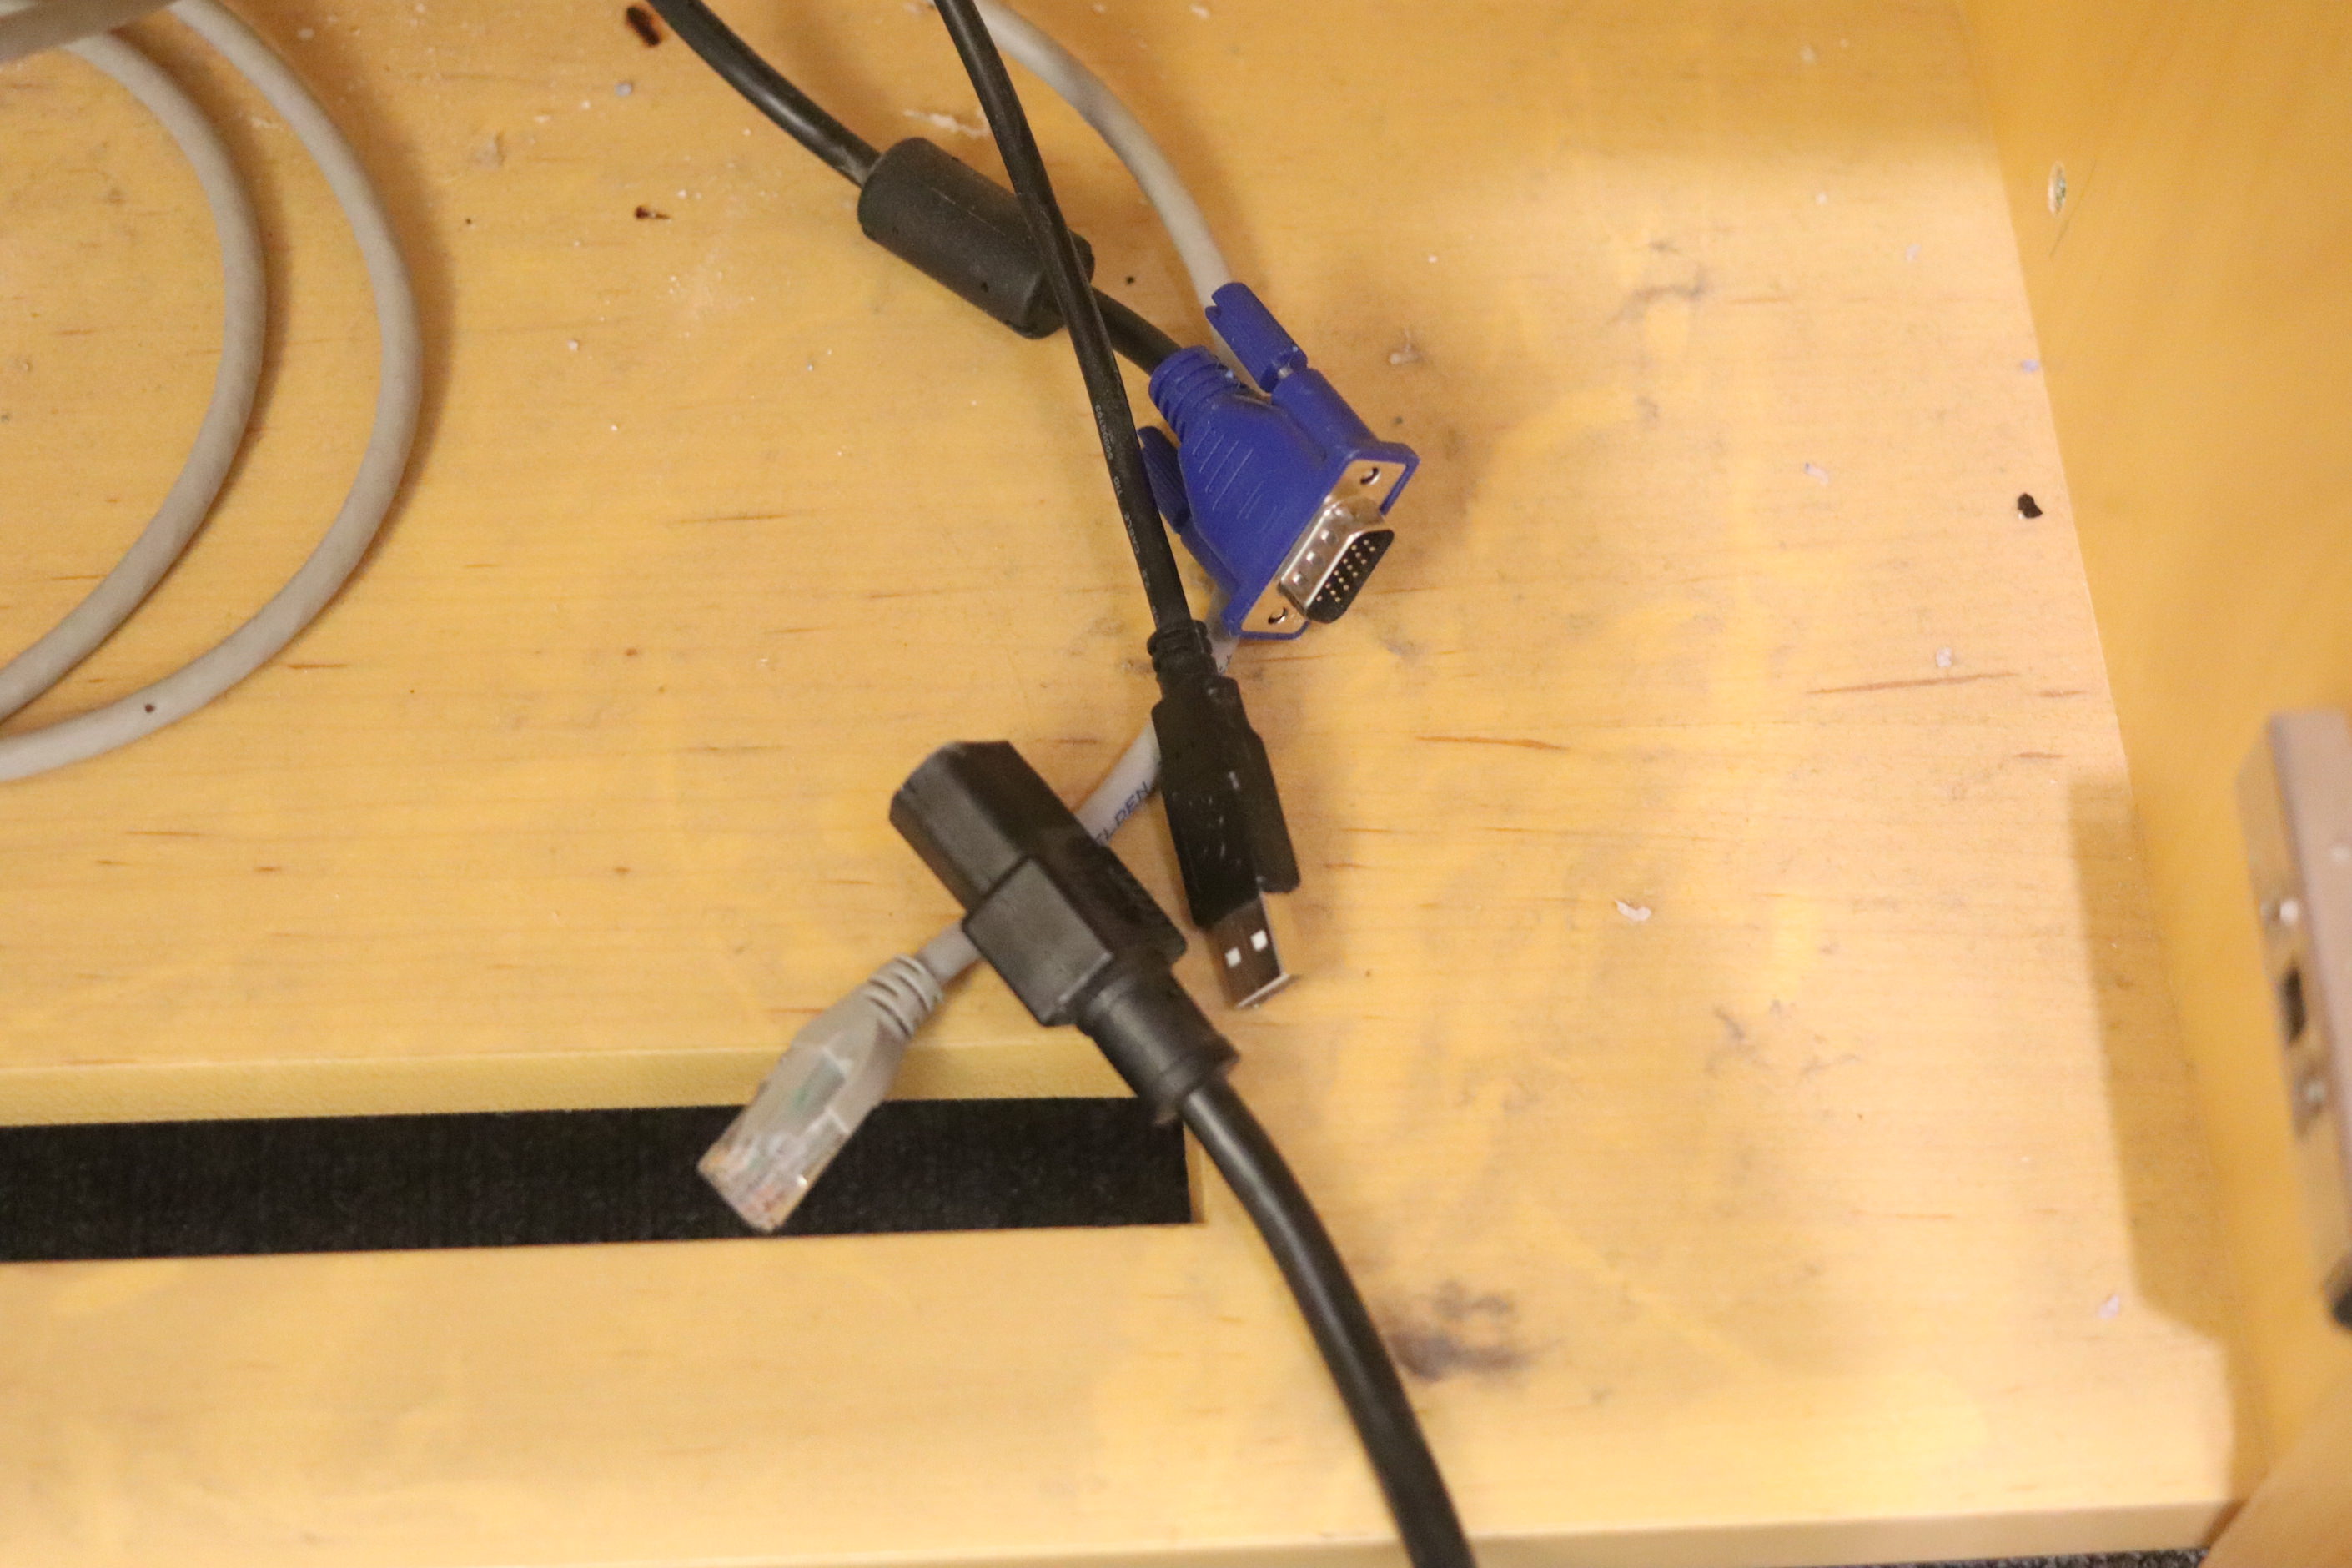
There were cables connected to the the monitor, which went into a wall. Opening up the cabinet revealed where those led to: a USB plug, a VGA cable, an ethernet cable, and a power cable for a presumably ATX-sized PC that wasn’t there anymore.
I got a USB-C to VGA adapter and plugged it into my Mac. It kinda worked, but not really—the touches were recognized as long presses which made any practical use of the display very hard on a Mac. But it did something, which was a great start.
Bring in the Pi
Honestly, now that I’m thinking about it again while writing this post, I realize that I might’ve started looking into the display just to see if I could do something with the Raspberry Pi. Talk about solution looking for a problem.
Anyway, I needed an HDMI to VGA adapter, and of course I had a power supply for the Pi, and I could just test it right away.

As soon as I got a hold of the wildly overpriced adapter, I was ready to play around with it and see if the display actually worked.
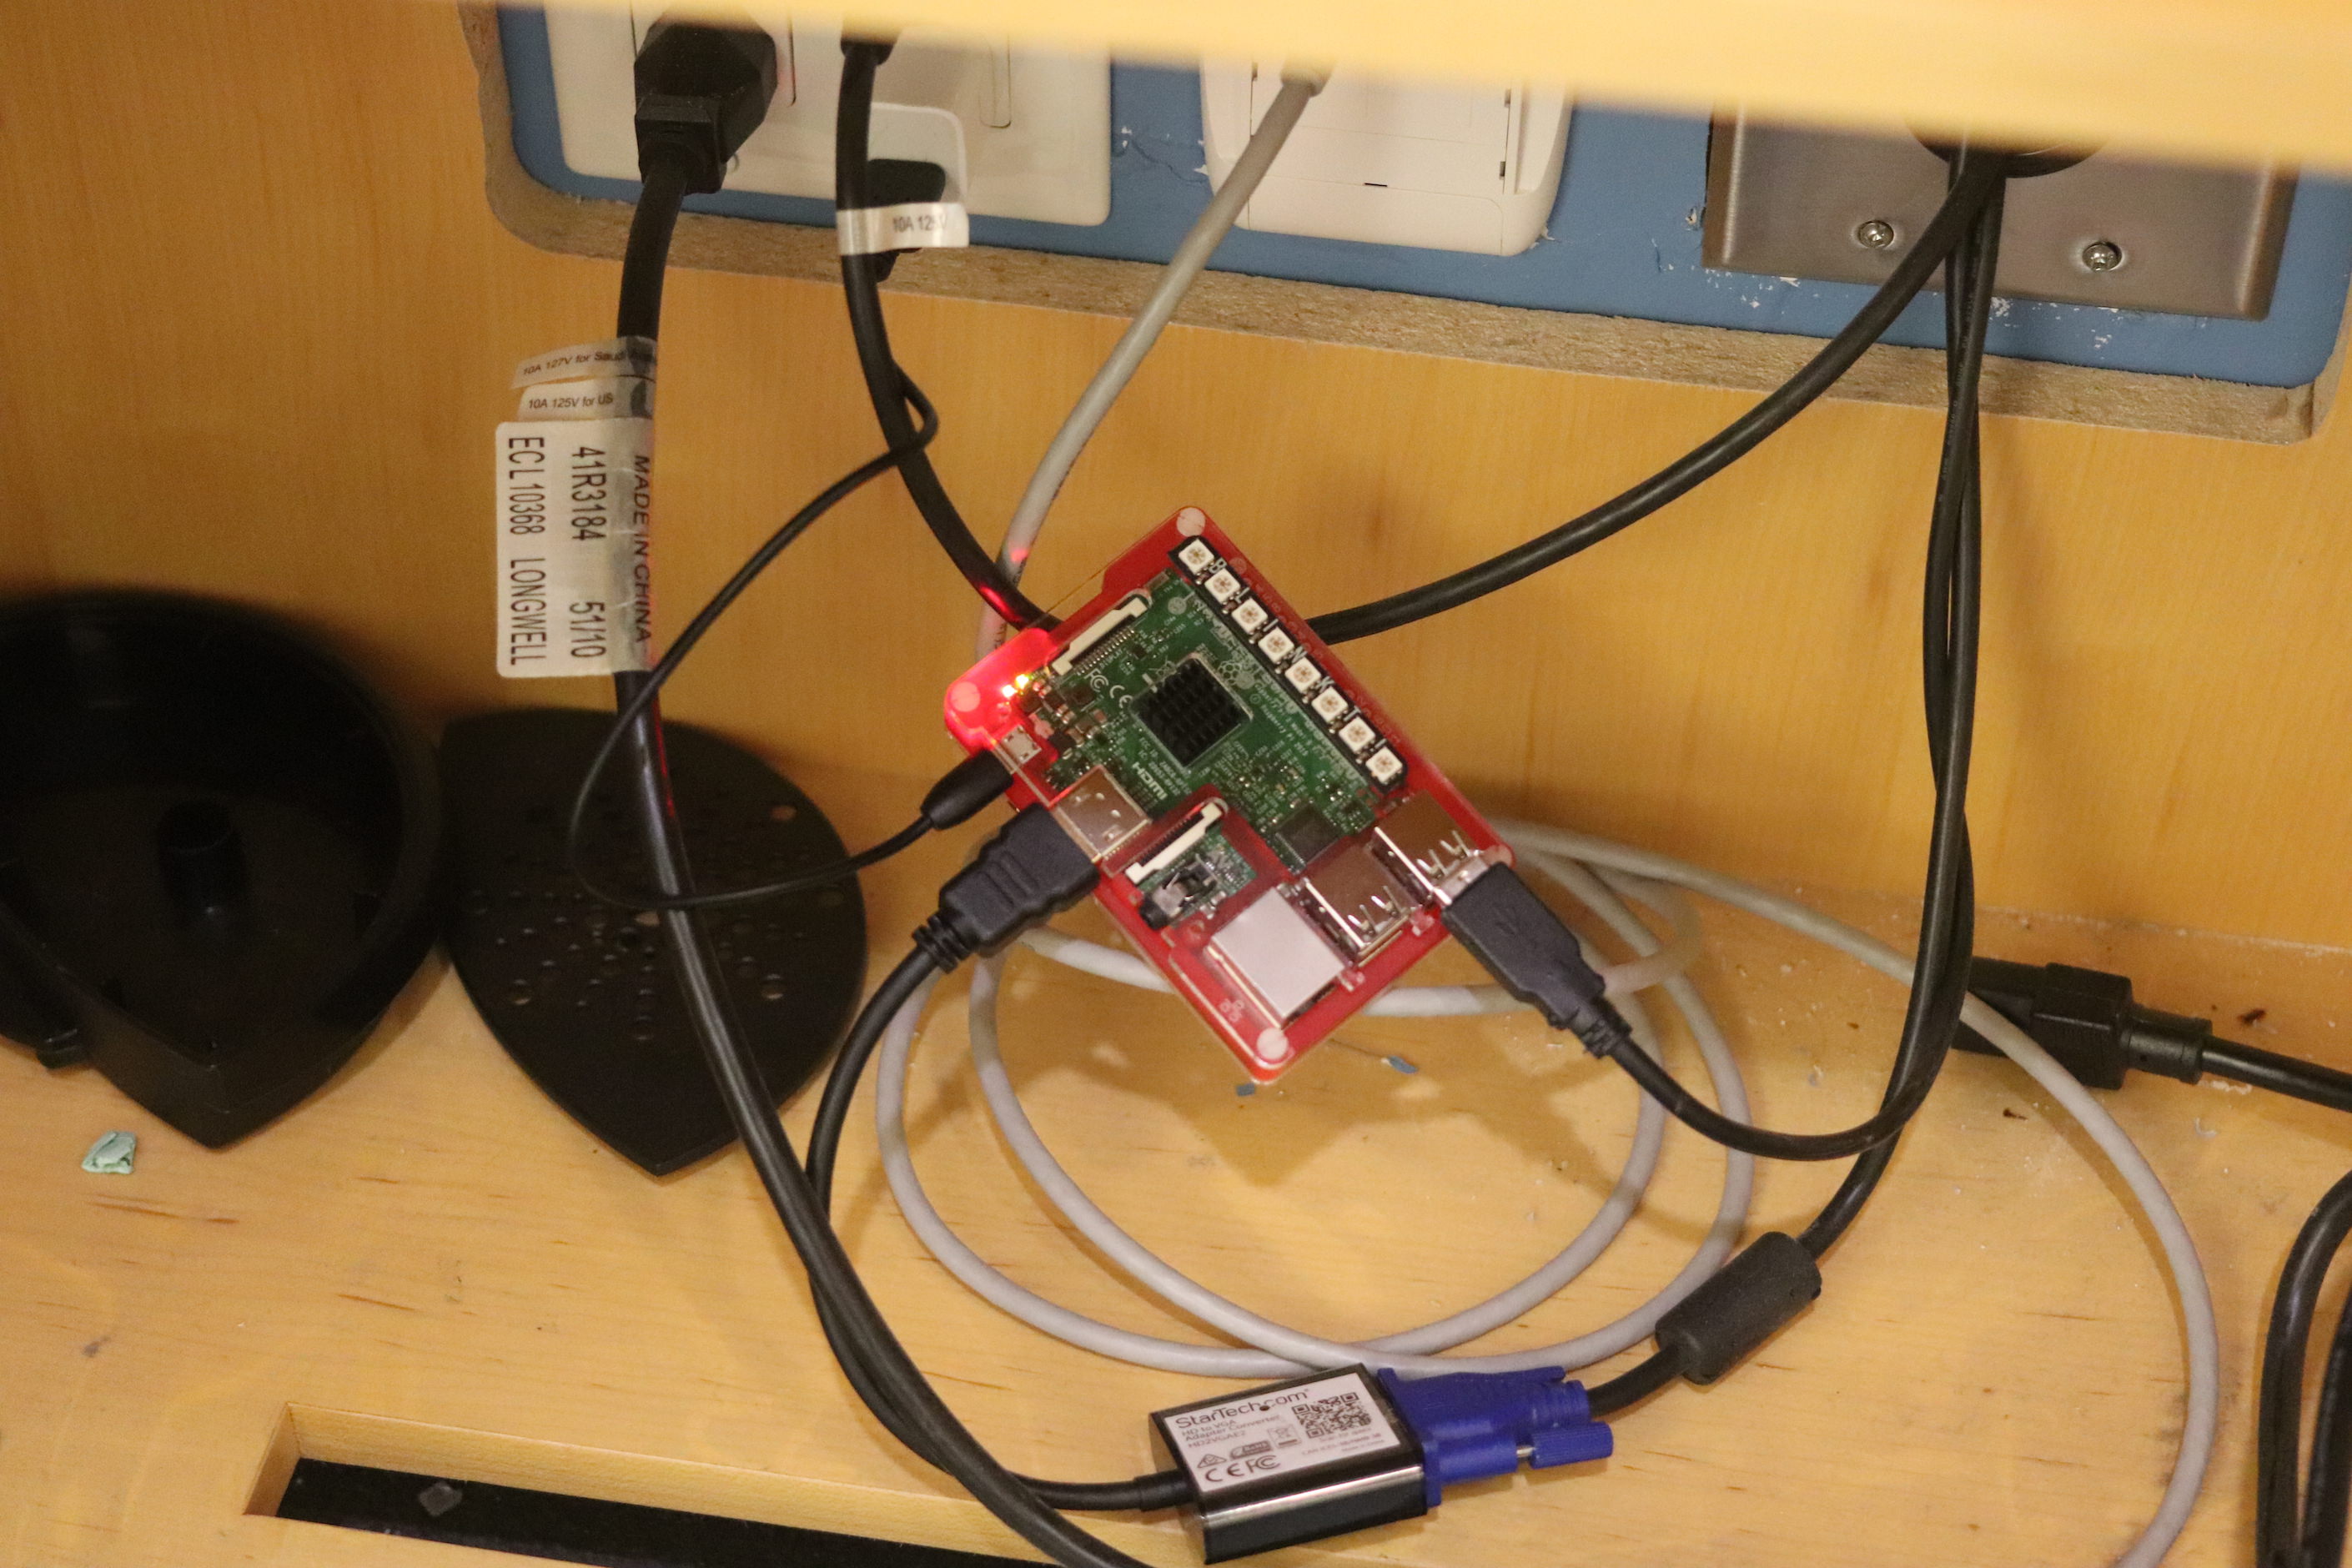
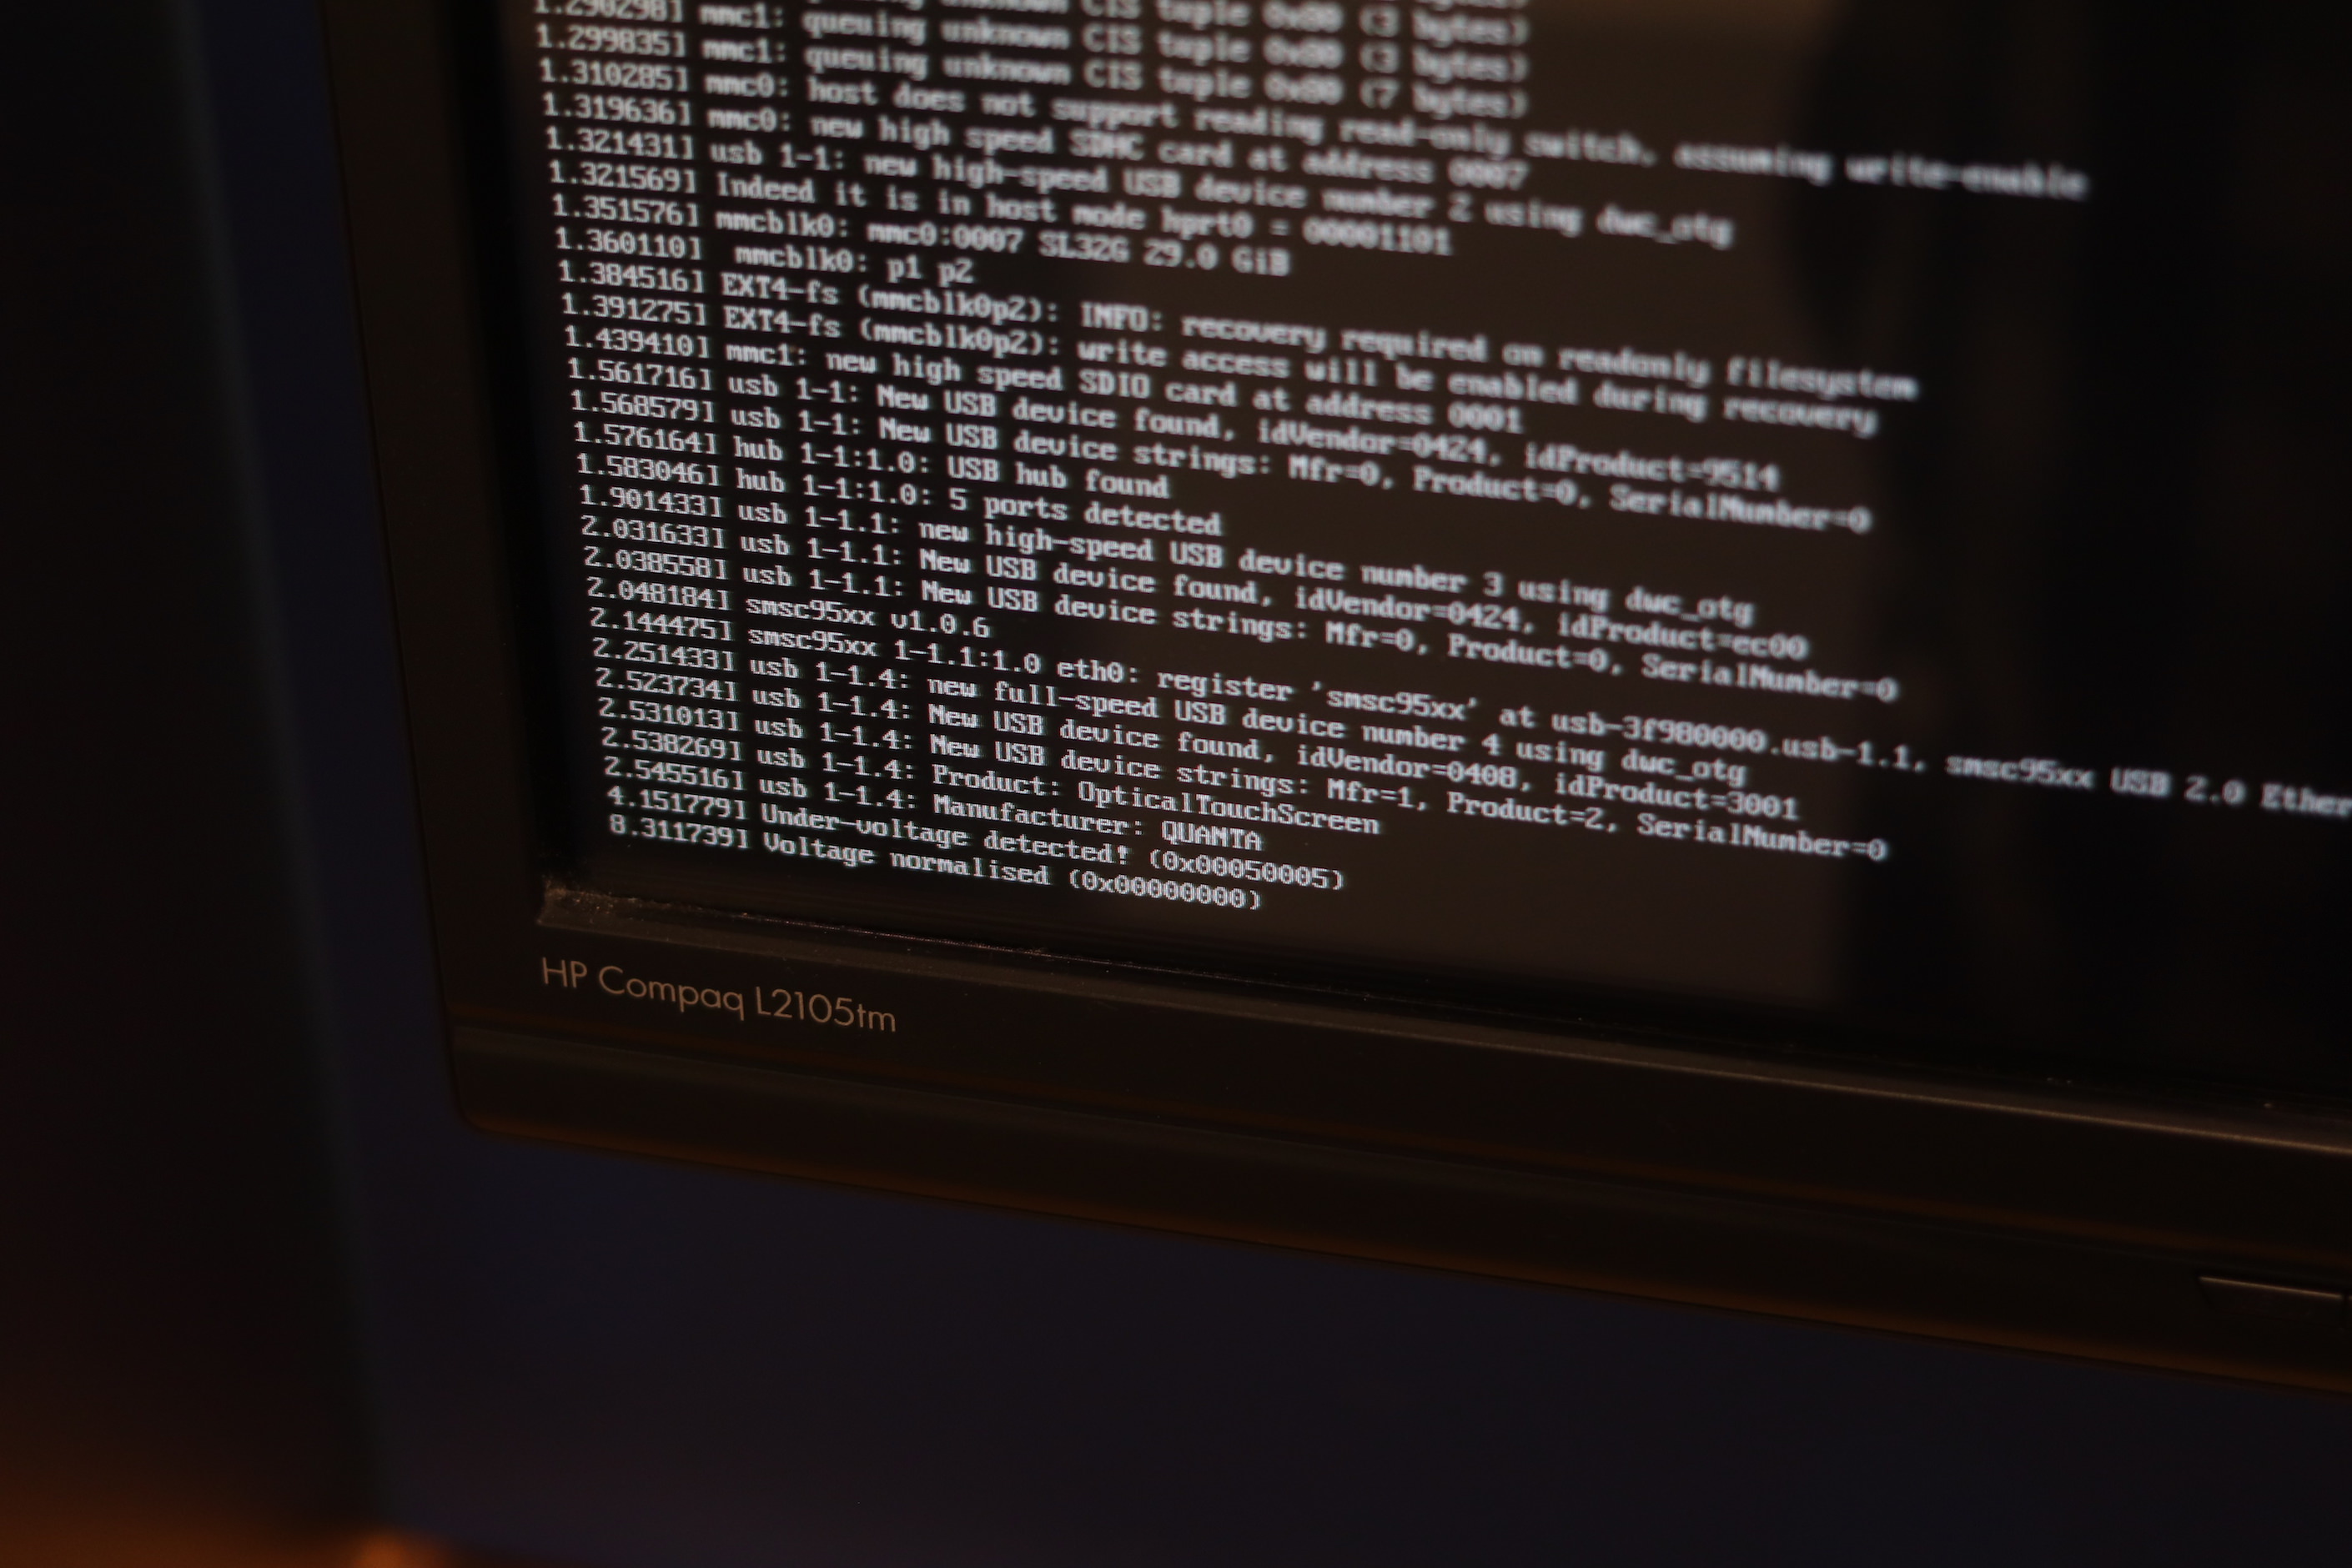
As soon as it booted, it worked. The device was recognized as “Optical Touch Screen” during the boot. It showed a 1920×1080 picture, and the touch layer functioned as expected—no long presses or anything.
The Software
A webpage would obviously be the easiest thing to whip up. So I started working on it.
The Layout
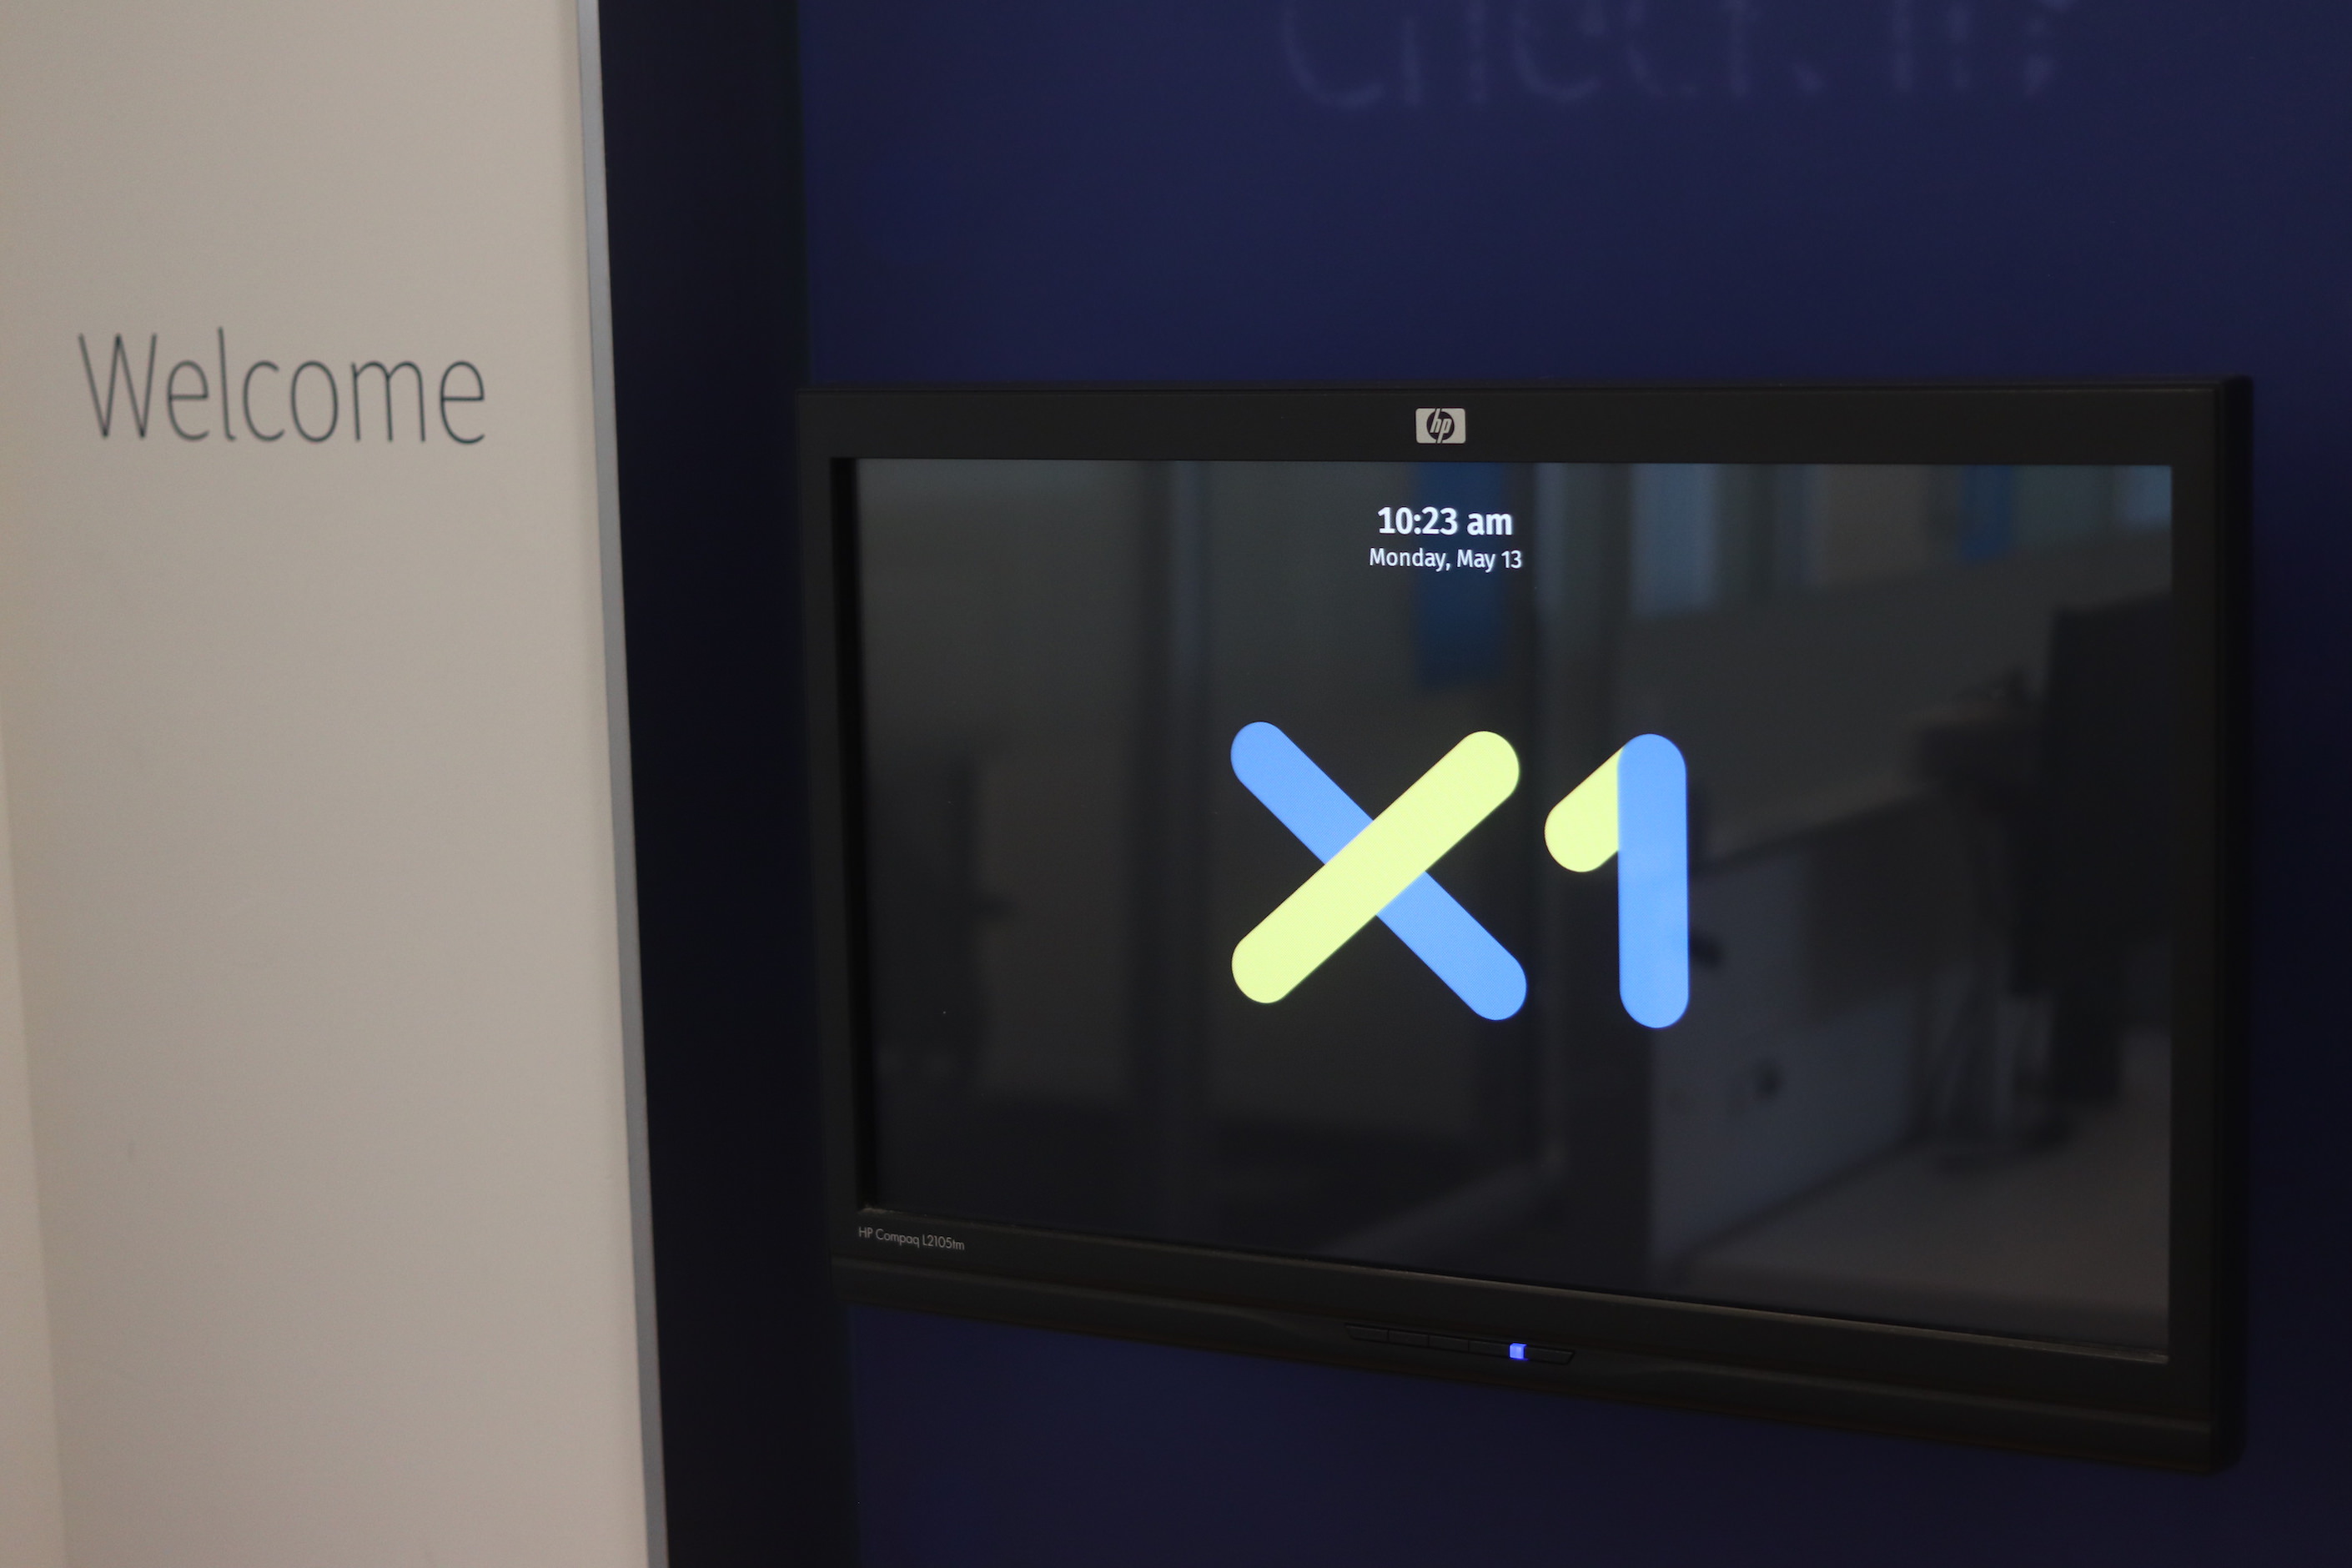
With a fullscreen browser, I could get the full display real estate. A dynamic layout would be redundant and overkill, so to keep it simple I decided to give the main content area a static width and height, and divide it into 120×120px squares—16 columns, and 9 rows.
I put our team logo, X1, in the middle, and put the time and date at the top.
Time and Date
I used the Day.js library to show the date and time, and Vue.js to refresh it every minute so the time and date kept updating.
However, getting the initial time was a problem, because the Raspberry Pi has no battery and cannot keep time.
Which brings us to…
Connectivity
The ethernet cable was dead. The guest WiFi worked great for git connectivity and getting the code from my Mac to the Pi, but there was an issue while getting the time.
RBC has its own NTP servers, but they restrict access to it so only authenticated devices can reach it. They also block any other NTP servers, so no device on RBC’s guest network can check for the correctness of time.
So, I set the Pi up to connect to my phone, and just turning my hotspot on at launch was enough to get the current date and time.
Launching Everything
Editing ~/.config/lxsession/LXDE-pi/autostart to add a couple of lines of configuration to turn the screensaver off, keep the display on, launch the web server for the website, launch Chrome in fullscreen, and to hide the mouse cursor was the final step.
Wait… what about touch?
The Raspberry Pi ran in this configuration for months.
Then came a time to add a notice. So I cobbled up a modal window, and added a button to activate it.
It worked… OK. -ish.
The interaction worked great—but the Pi 3 was not powerful enough to run the CSS transformations smoothly.
My work there ended before we could write the final copy though. So I packed the Pi up, brought it home, and used it as a VPN when I went back home for a long summer holiday.
I still miss the display, and look on Kijiji weekly to see if I can find an affordable one.