Starting a Homelab
It’s been a long time since I’ve last built a PC. I’ve been using Mac’s since before the Intel switch happened, so, you could say I was really out of touch with the whole scene.
So, when I wanted to build a PC to mess around with, I really did not want to get back to the whole thing again. I wanted something that was expandable, but not too complicated to build. I also prefered a smaller form factor—not Raspberry Pi sized, but comparable.
Long story short, I got this tiny thing, and I’m so giddy about it!
Let’s Define “Messing Around”
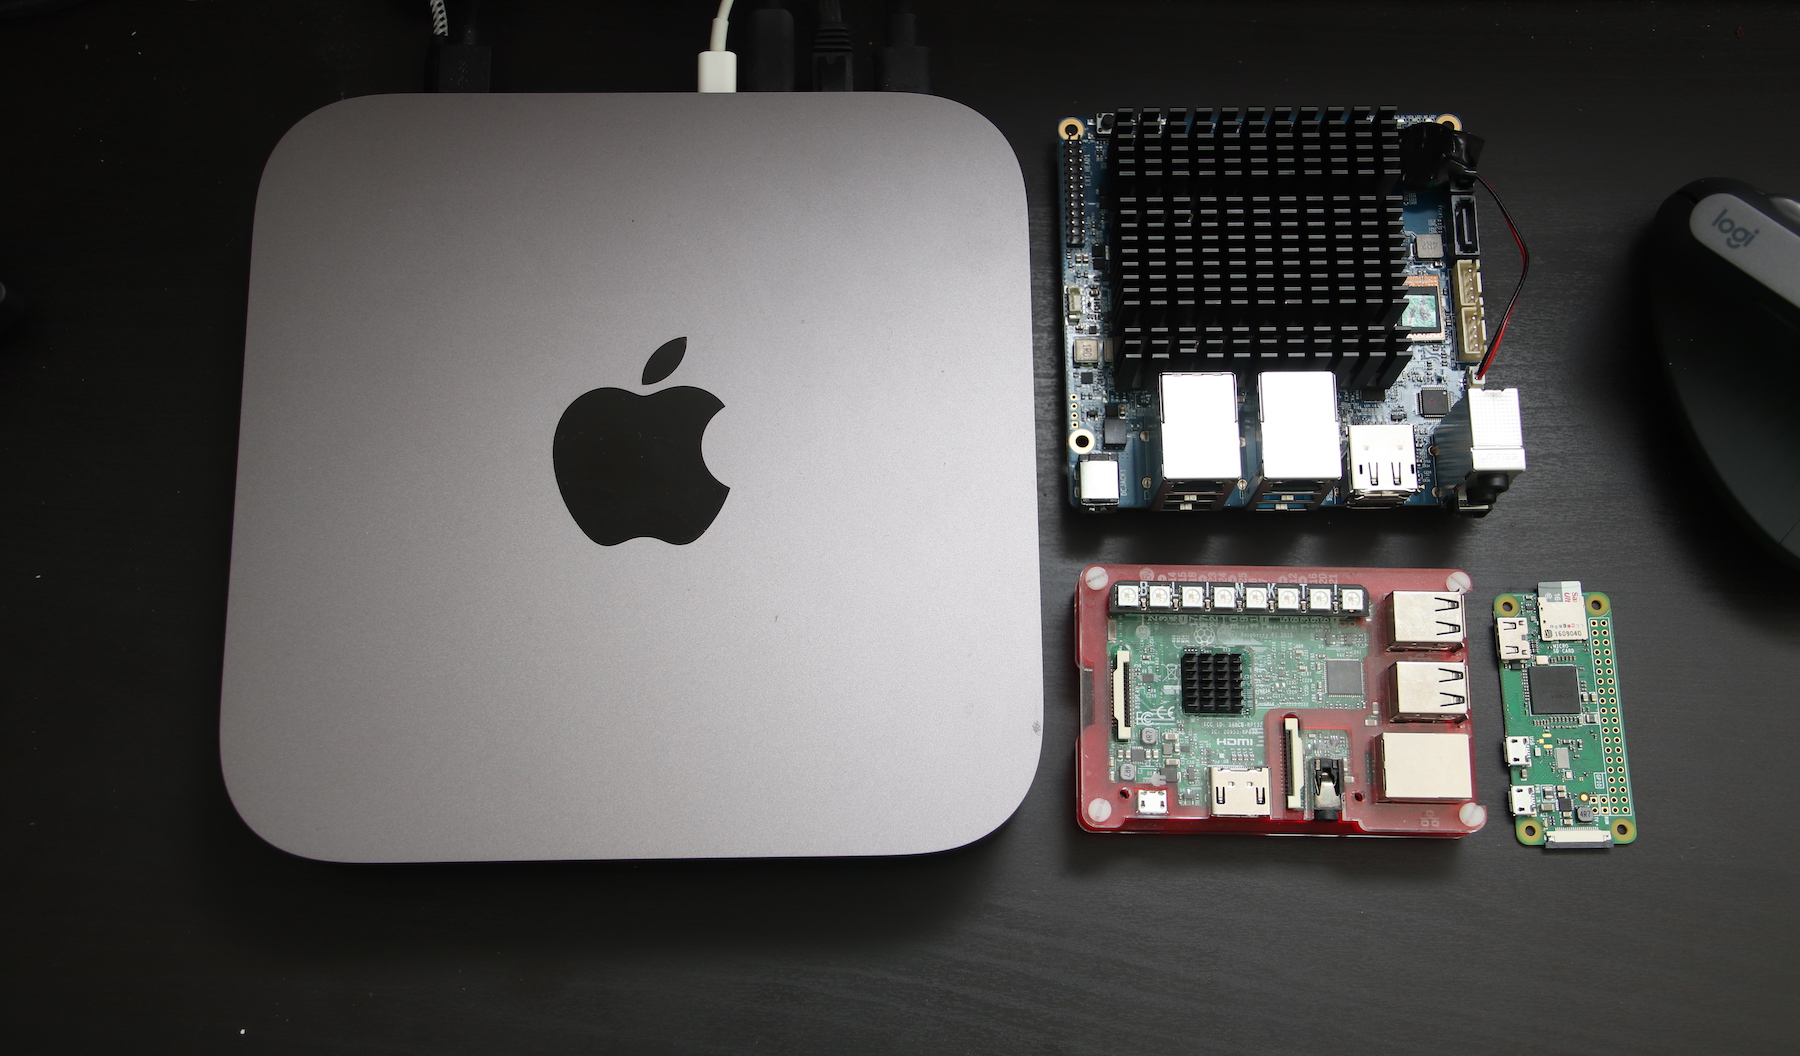
At the beginning of the year, when I was still hopeful about my prospects and naïvely thought I wouldn’t be affected by the pandemic, I got myself a Mac mini to replace my 5-year-old MacBook Pro. It was a refurbished model, and the configuration I wanted was available with a 10 Gigabit Ethernet connection.
So, naturally, I went out seeking other multi-gigabit network devices to connect to… Naturally.
Connect all the things
The next best thing to a network attached storage that supports a fast network interface is a multipurpose server that supports a fast network interface.
I started looking for cheap, small, low-power computers that were capable of having multiple storage options and a fast network port or two. I did look at refurbished TinyMiniMicro PCs, which were only satisfying size and price requirements. No multi-gigabit network speeds, 2 laptop-sized drives tops.
I also looked into custom build options—a PCIe card could be used to add 10GbE networking to any PC, but even the smallest PC’s were huge, would end up costing more than I’d budgeted, and required more knowledge in modern computer building than I wanted to devote my time to.
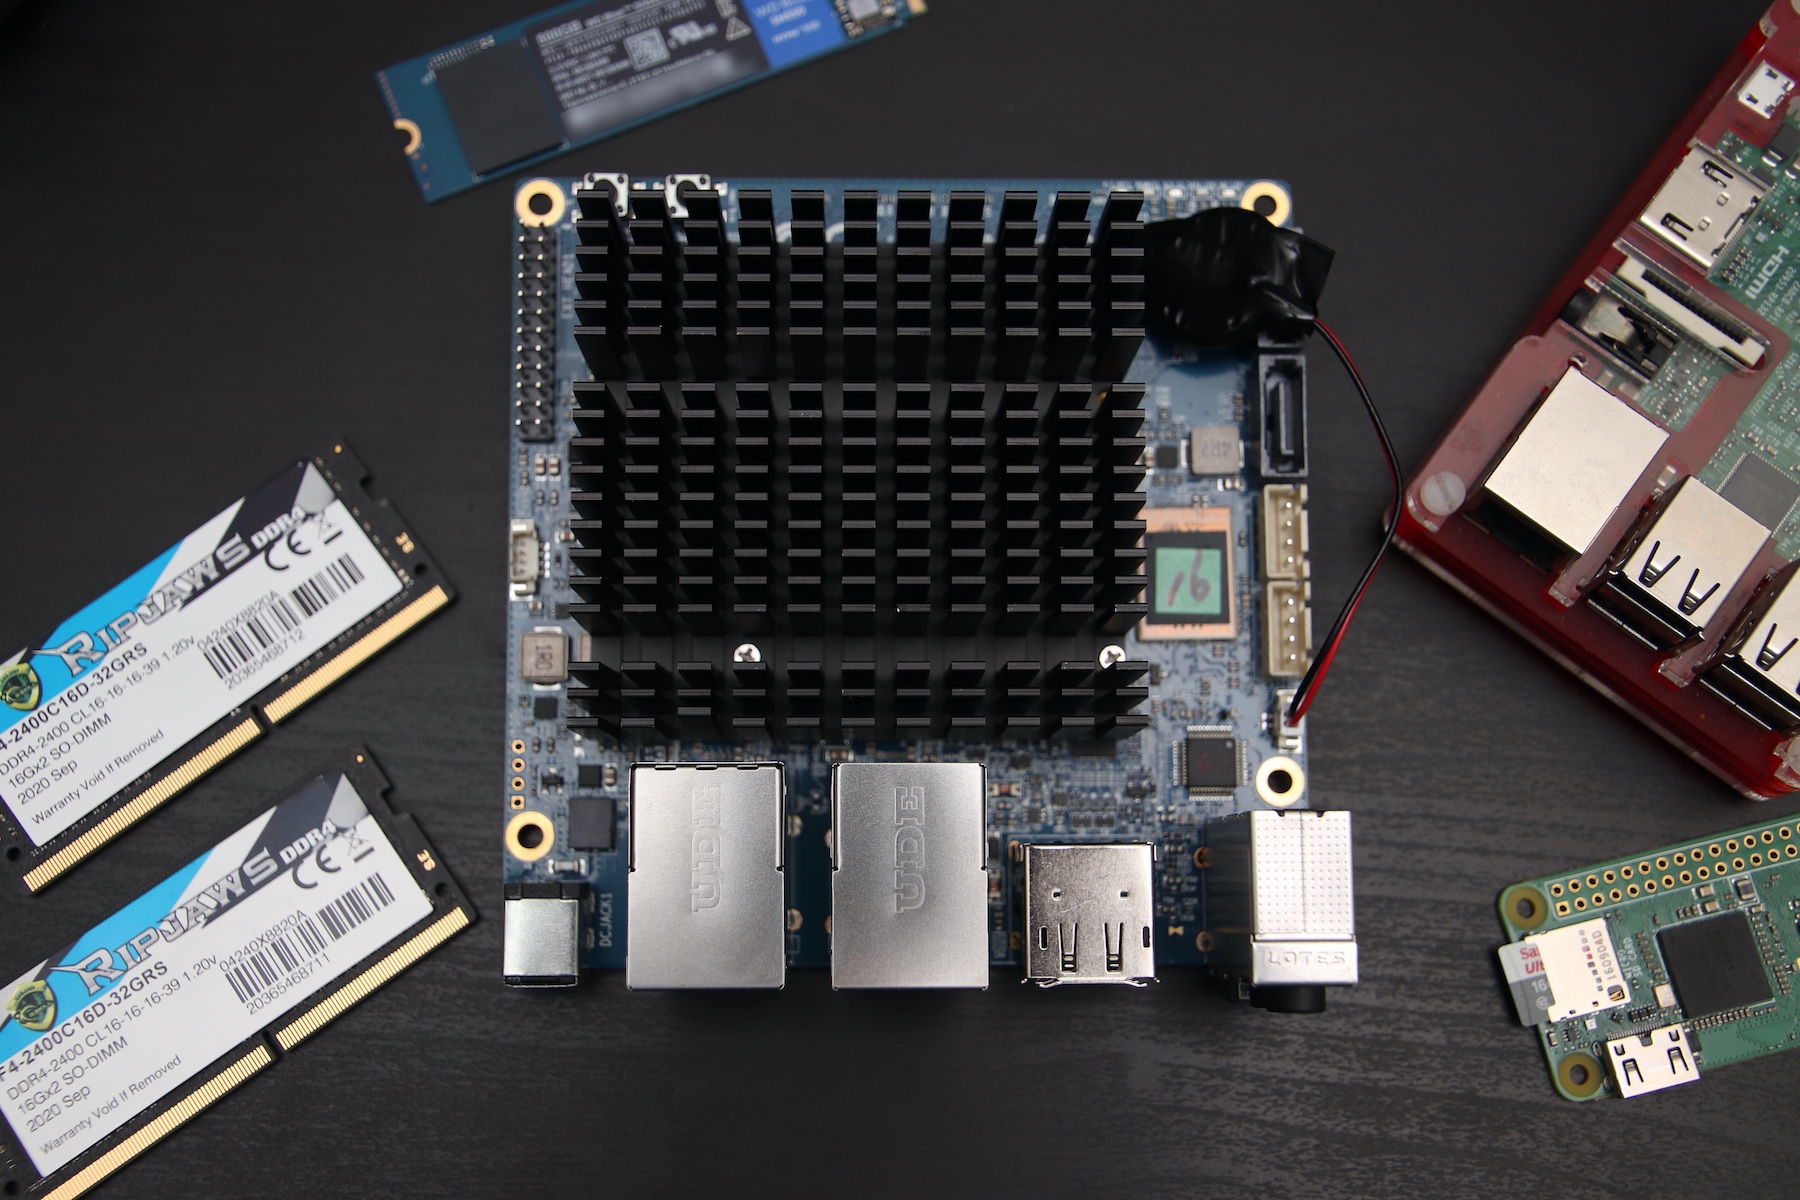
Then I came across the ODROID H2+.
- Only barely bigger than the palm of my hand.
- 4 core Intel CPU.
- Accepts up to 32GB of RAM.
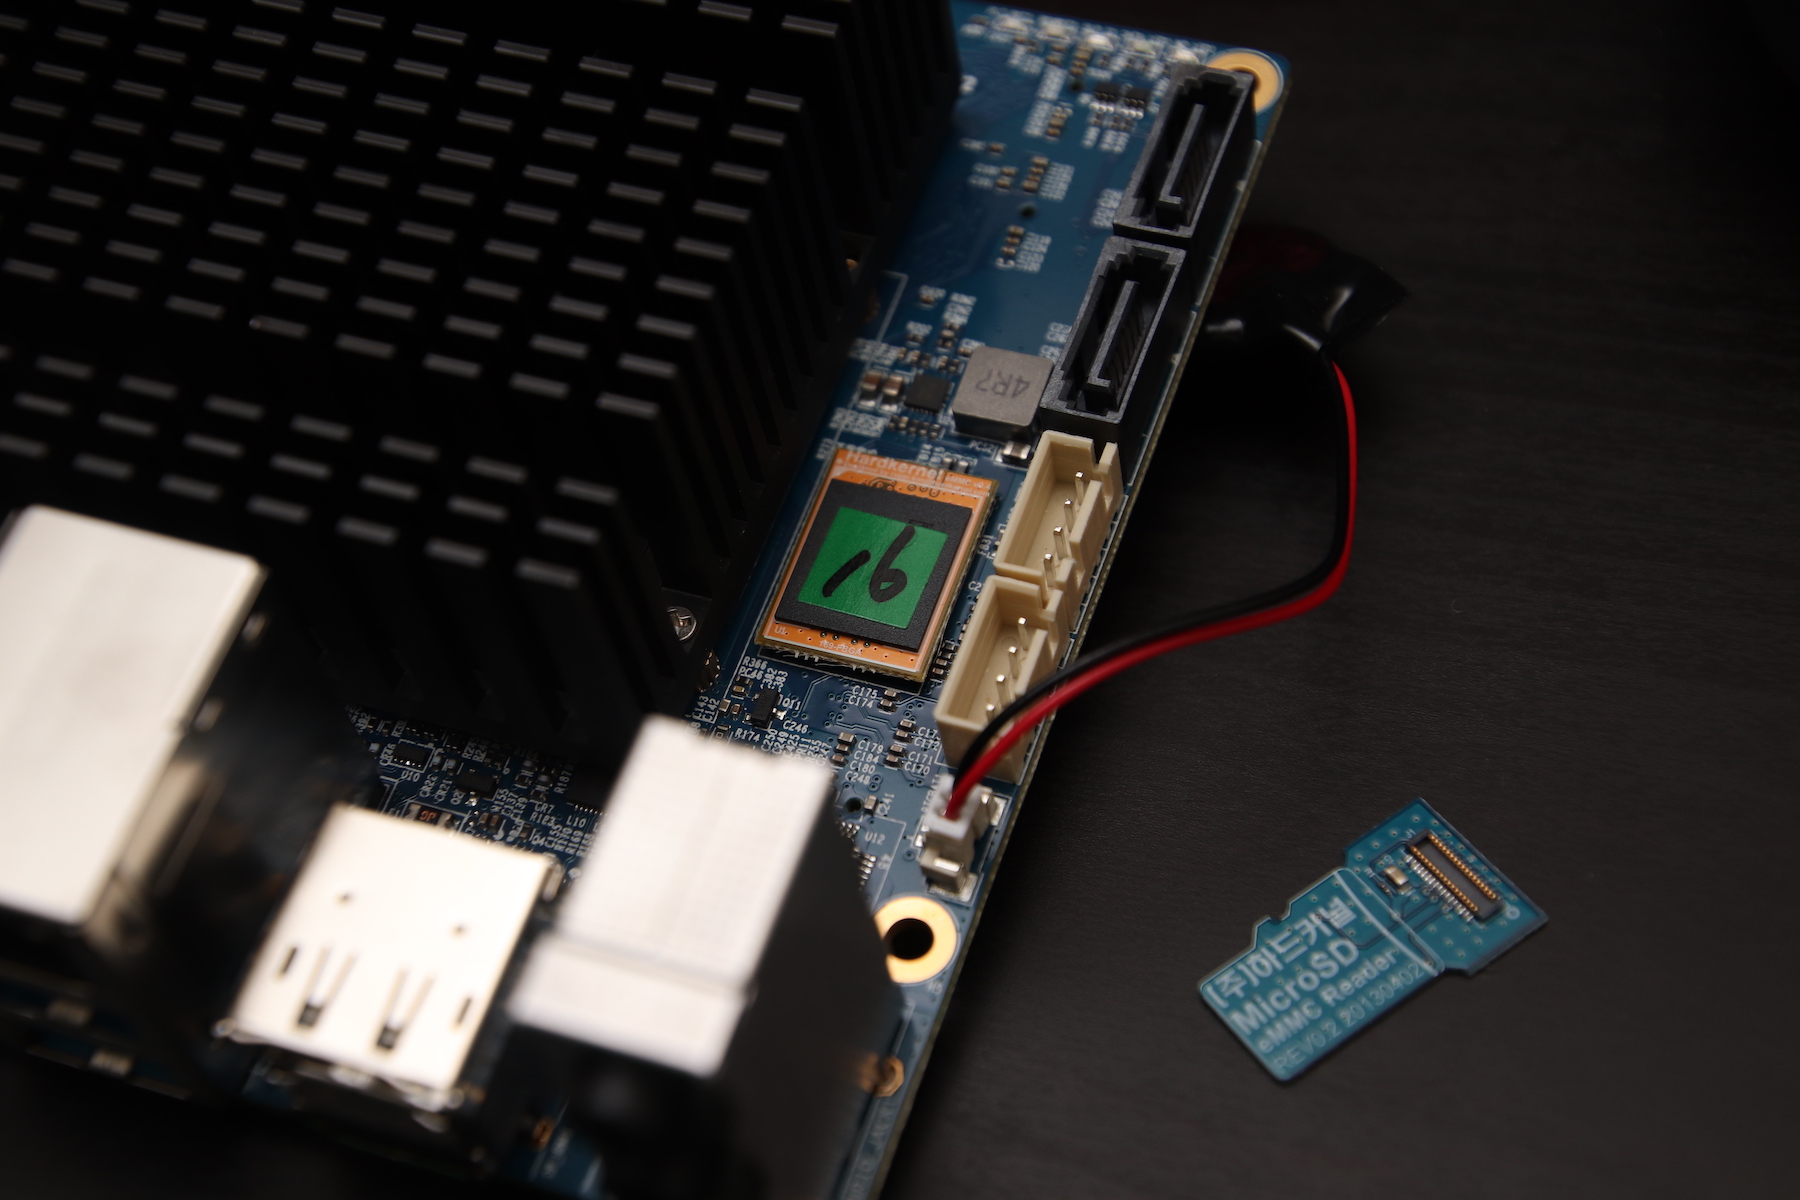
- Has eMMC, NVMe, and 2 SATA ports for storage.
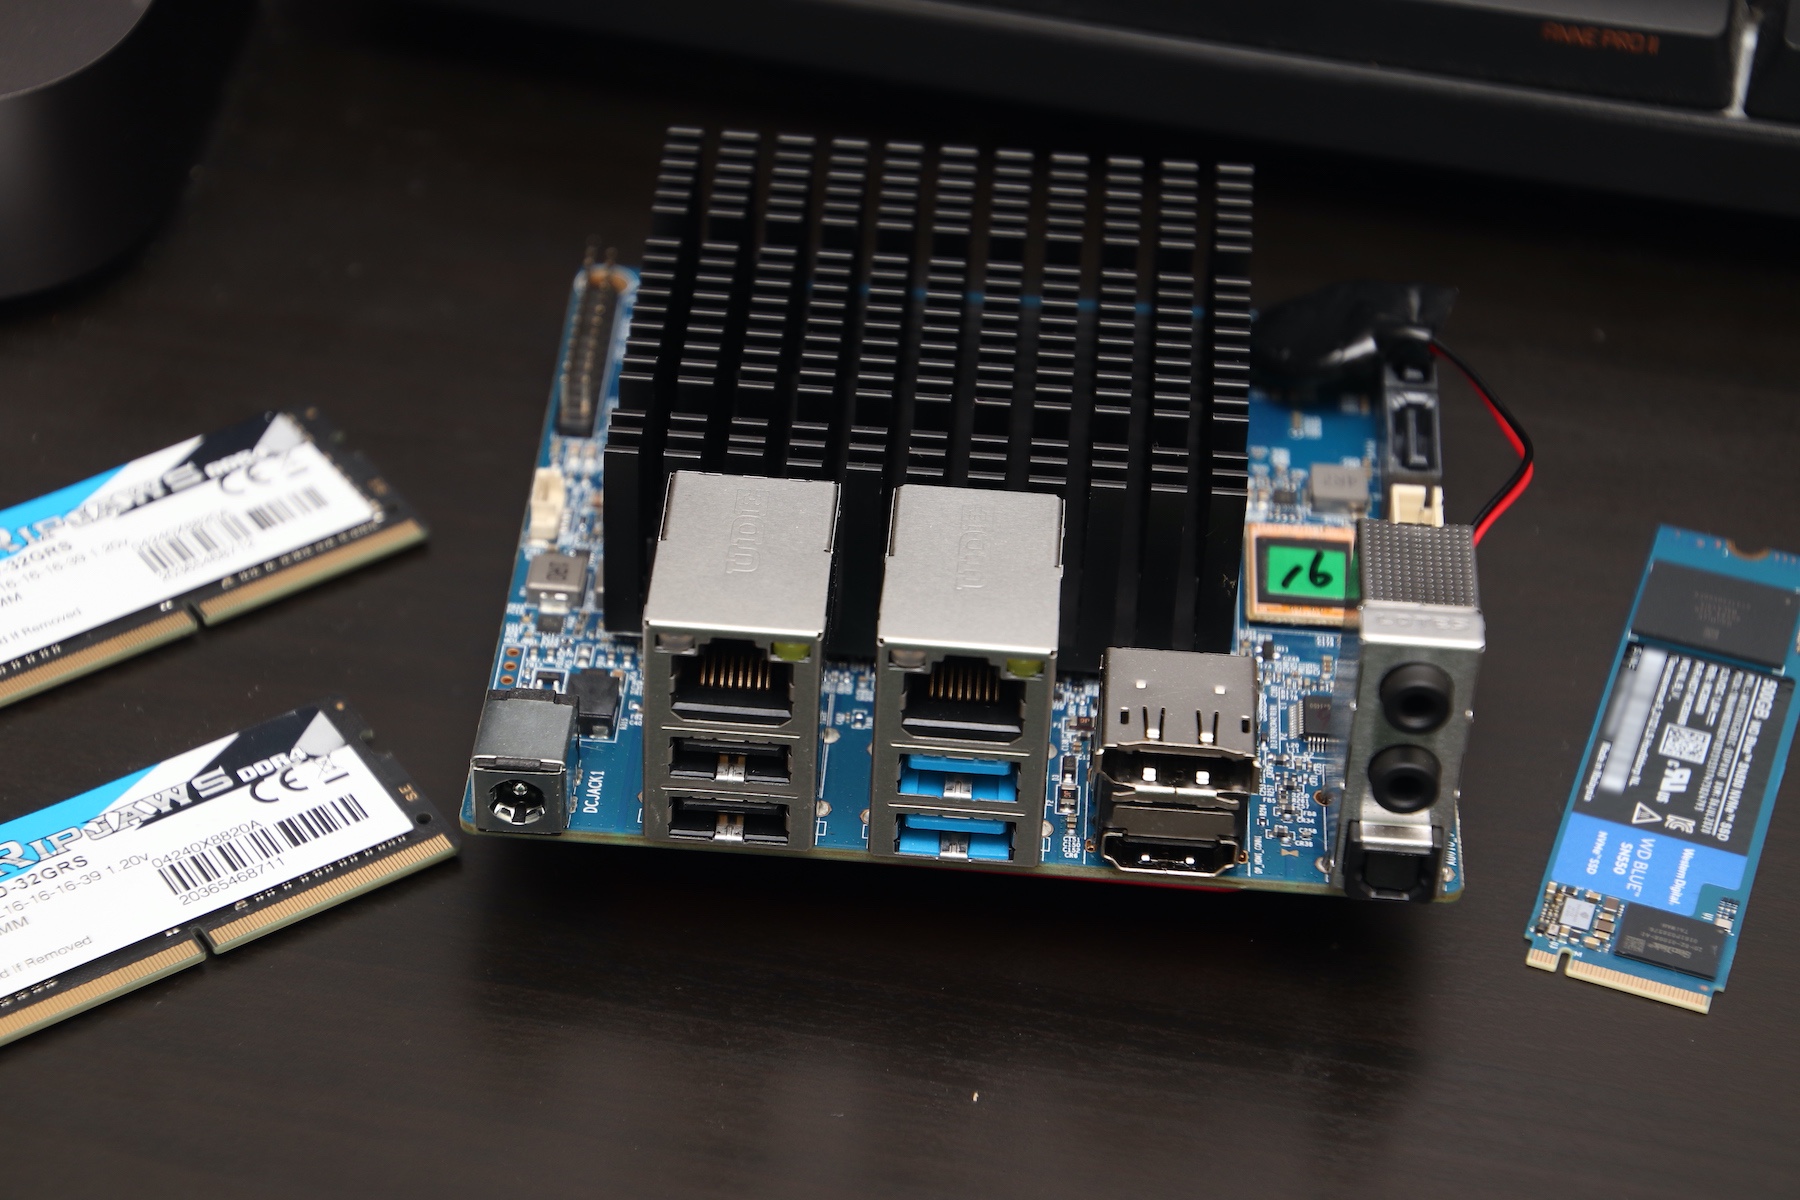
- Provides 2⨉ 2.5GbE network ports.
It was everything I wanted. The CPU is beefy enough for regular usage and boring enough to support any server software, the storage options are plenty (and just enough for my use case), and it cost less than any other PC I could get that remotely does what this thing does.
Best laid plans for an operating system
There are a three widely used operating system options if you want to create a hybrid NAS/VM server: OpenMediaVault (OMV), unRAID, and FreeNAS. These OSs mainly function as a storage server, with added functionality for running virtual machines and Dockerized software.
OMV is Linux-based and free, unRAID is proprietary and paid, and FreeNAS is its own beast with ZFS storages and stuff, so naturally I went with OMV.
My plan was to connect 2 multi-terabyte NAS drives (think WD Red’s or Seagate IronWolf’s) for storage, some cheap NVMe drive for virtual machines, and the operating system would reside on the eMMC chip.
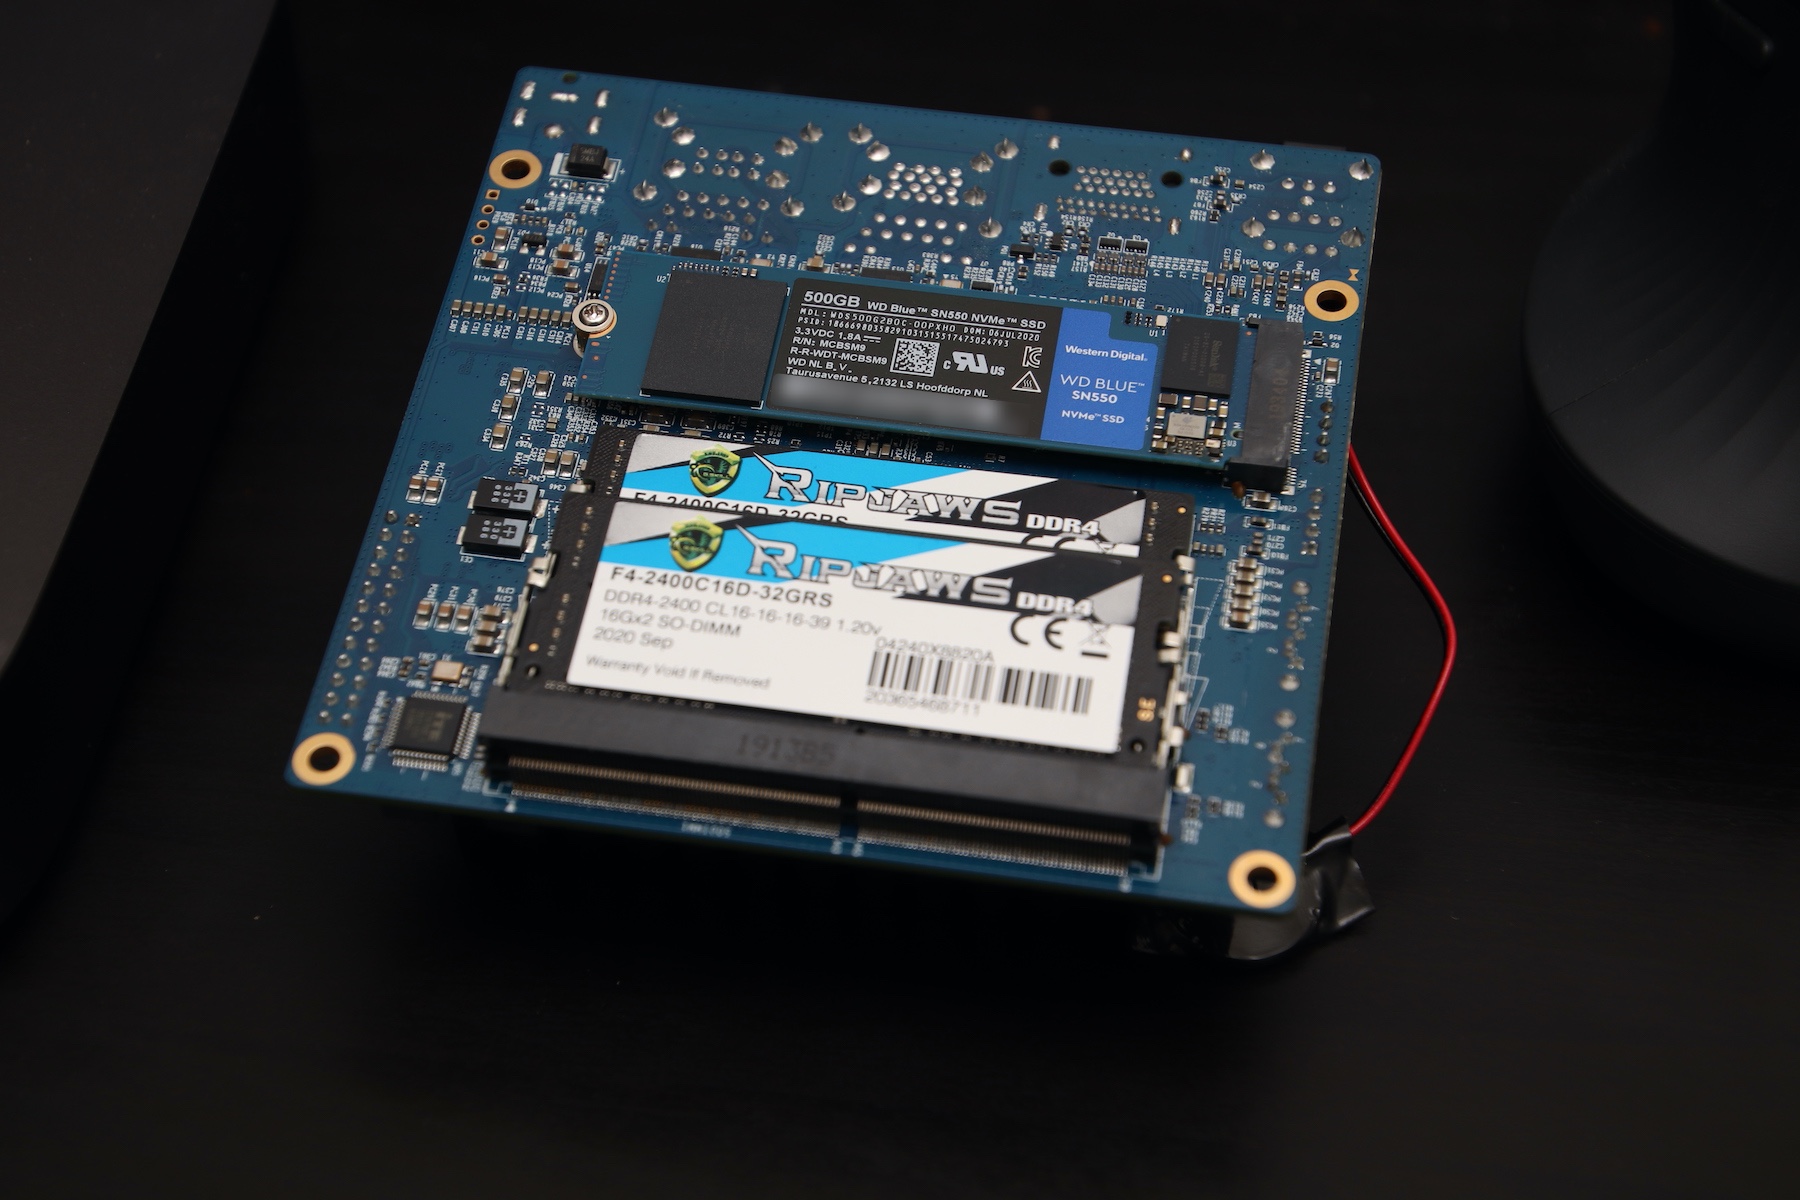
I ended up getting the cheapest NVMe drive, a 500GB WD Blue SN550, and cheapest 32GB of RAM I could find at the moment, G-Skill Ripjaws.
Installing OpenMediaVault
I ordered everything from different places, so they took some time to get to me. When I got the minimum-viable-configuration, I started playing around with it, and started trying OpenMediaVault for a basic configuration.
Issue #1: Storage Woes
OMV didn’t want to install on the board at first, not because of any incompatibility, but because of a Debian auto-partitioning feature that gets confused when the installation storage space is smaller than the available RAM, which was the case with my 16GB eMMC chip and 32GB of RAM. 🤷🏻♂️
I circumvented that by installing Debian first, manually partitioning the eMMC drive, and installing OMV on top of it. This was not a fun experience, I’m not sure how I got it working, and I hope to never do it again.
Issue #2: Network Drivers
The 2.5GbE hardware is pretty new, so while the drivers for them will be coming in the Linux kernel with newer operating systems, they need to be installed manually with any OS that is currently available. Thankfully, I had a USB WiFi adapter lying around, from older Raspberry Pi’s, that was just plug-and-play and allowed me to get some connectivity for installing updates, and the Ethernet drivers, with ease.
Issue #3: The Auto-shutoff
Getting OMV running is trivial once you get Debian up and running… until you try to run it headless, and it turns itself off every 20 minutes.
Apparently, with a graphical Debian install and auto-login not set up, the OS will shut itself down if not logged in, because why not. I did panic a bit, thinking it was either a malfunctioning unit or power supply I had, or worse, even at this very early stage I had somehow managed to mangle the OS caused it to kernel panic (which is not something you want on a storage server), but nope—it was only an energy savings issue.
Putting more of it together
I needed more hardware for my H2+ to be complete.
There are 4 different kinds of cases for the board, and one allows for 2 3.5" large harddrives to be mounted to it. I ordered one from eBay.
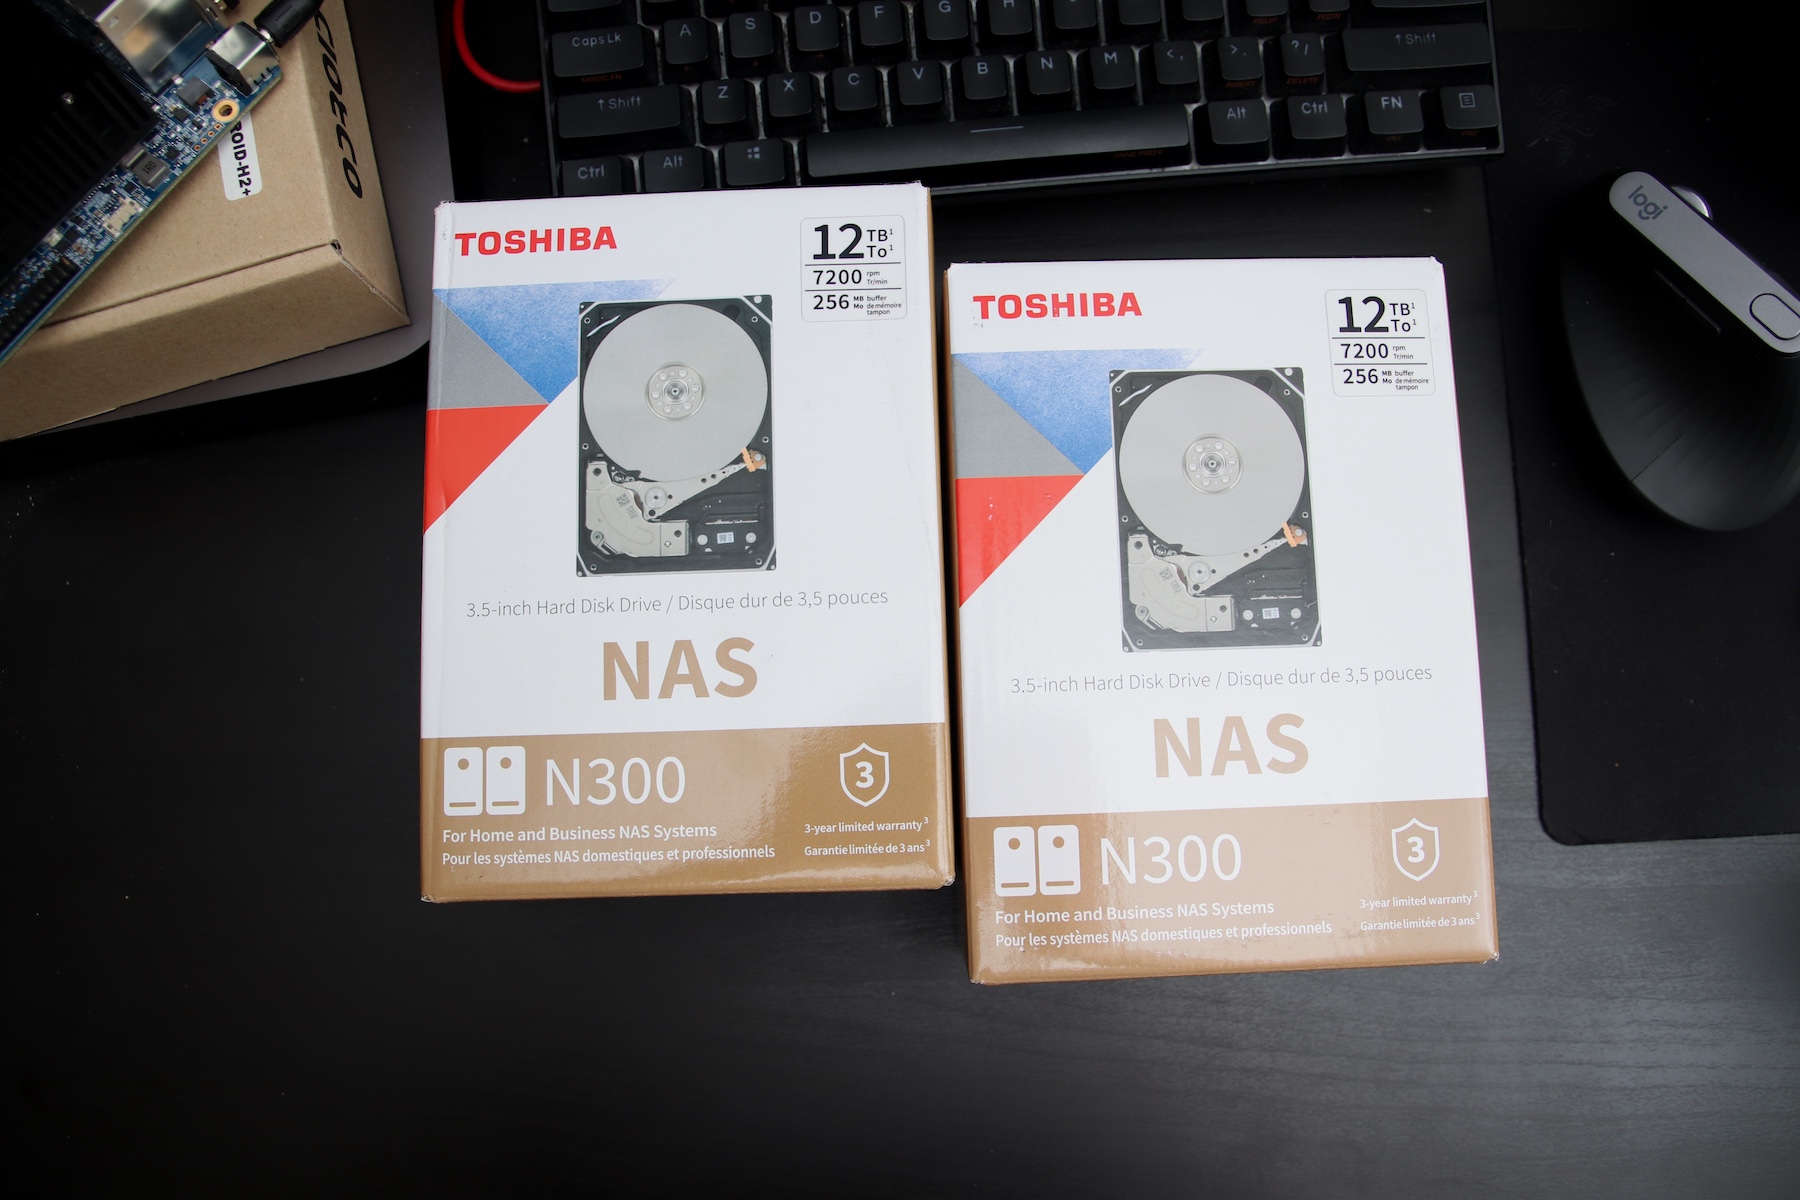
The case needs harddrives to keep it together, and I managed to find very cheap 12TB Toshiba NAS drives, which took a few days to get to me.
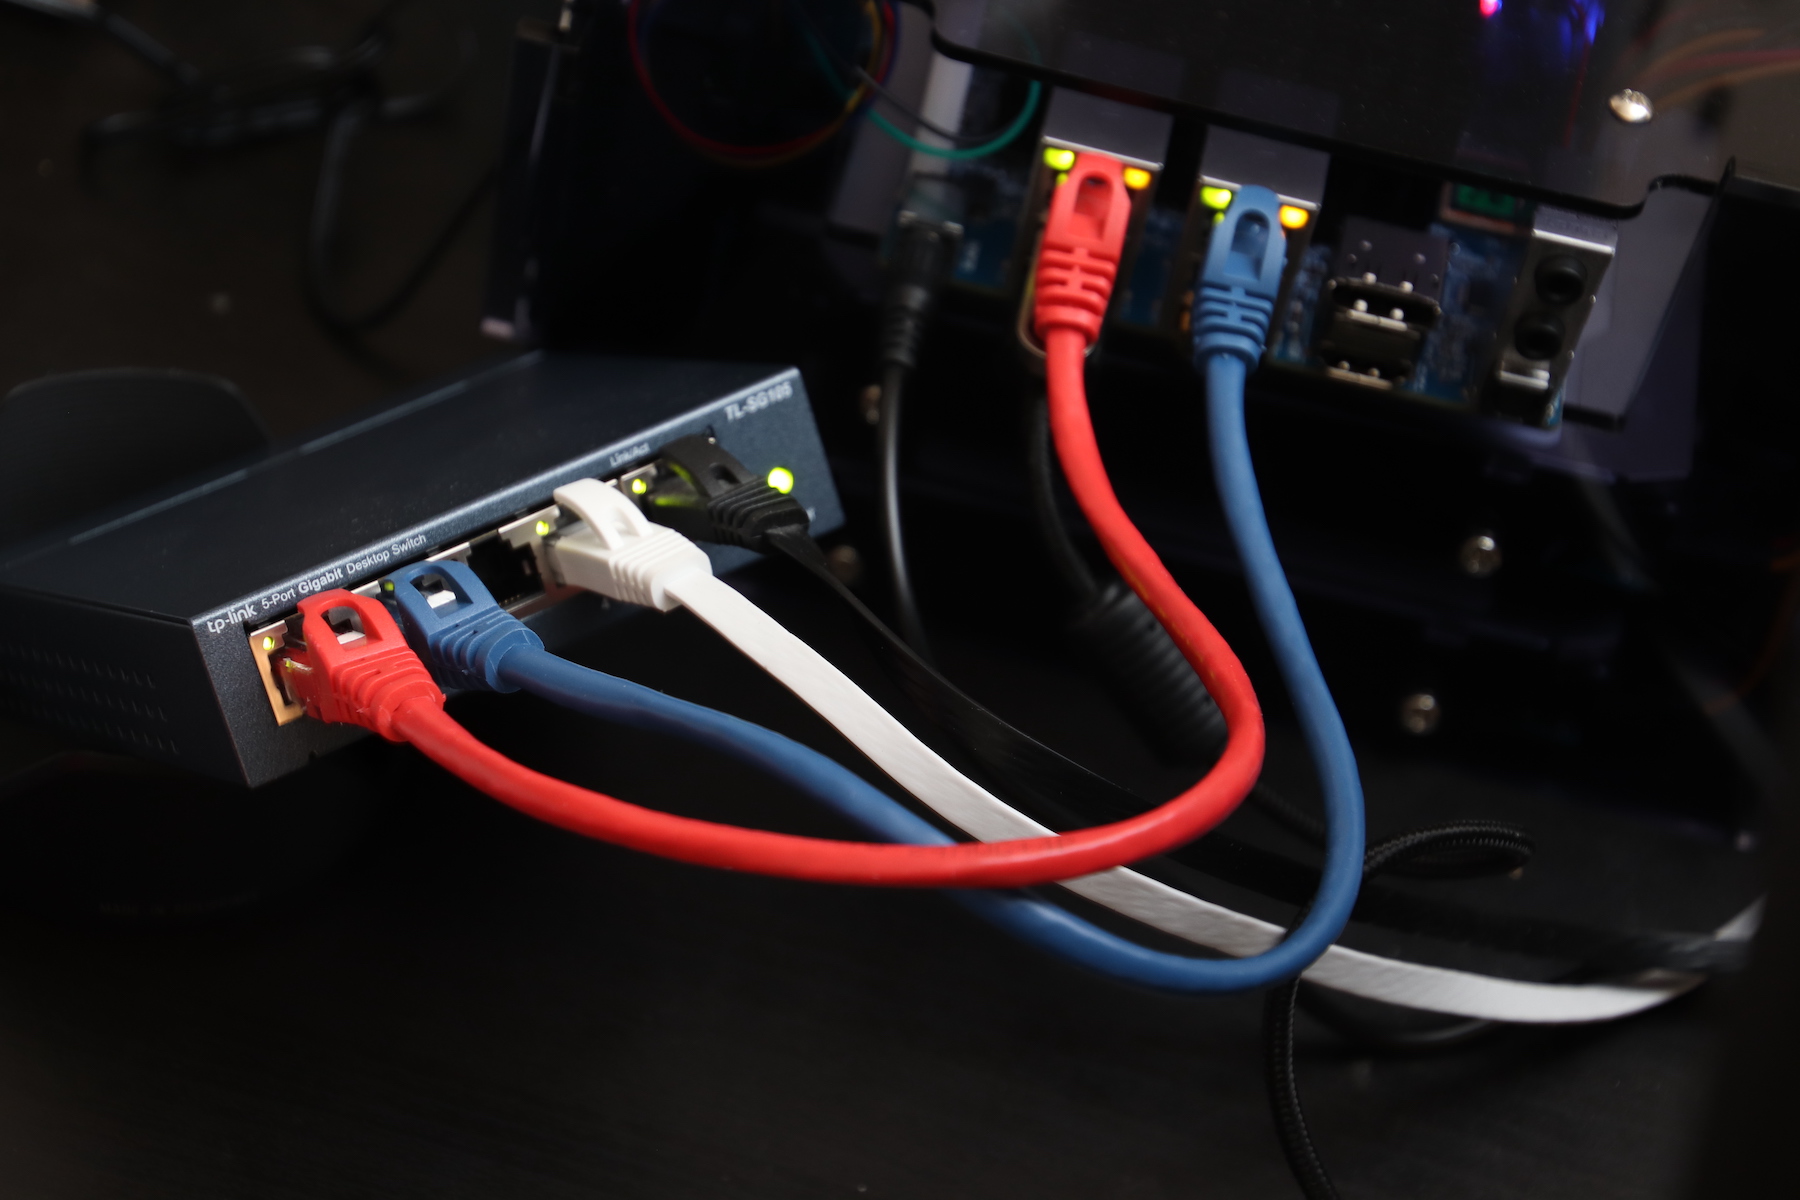
And finally, I needed a network switch to move away from the WiFi connection—10GbE devices were extremely expensive, and the 2.5GbE device from QNAP is not in stock anywhere, so I got a dirt-cheap 5-port switch from TP-Link.
Completion woes, new OS
When I put it all together, things started going more awry at first.
The harddisk drive conundrum
The system itself didn’t see the new drives. In the BIOS, sometimes both would show up, sometimes only one would, and sometimes none.
When a beefier power supply issue did not remedy the problem, I went back into the BIOS and played around with some features. Alas, enabling “Hot Plug” option finally enabled the drives from boot, without any additional trickery.
Constant writing
As easy as it was to set up the drives once they were seen by the system, Debian and OMV did something weird that I did not want to spend time investigating: When mounted, the disks made constant reading/writing noises. Like I was dumping gigabytes of data onto them.
Unmounted, they just spun silently. Mounted, all the writes, all the time.
Natural progression: Trying unRAID
unRAID is a more opinionated system than OMV, with its parity-driven redundancy model, and more integrated virtualization features. It’s also paid, and runs off of a USB stick.
As unRAID uses the unique GUID number of a USB drive for its payment registration system, and the eMMC chip didn’t have one, I went out and got a 3-pack of 16GB USB2.01 Kingston drives for $15.
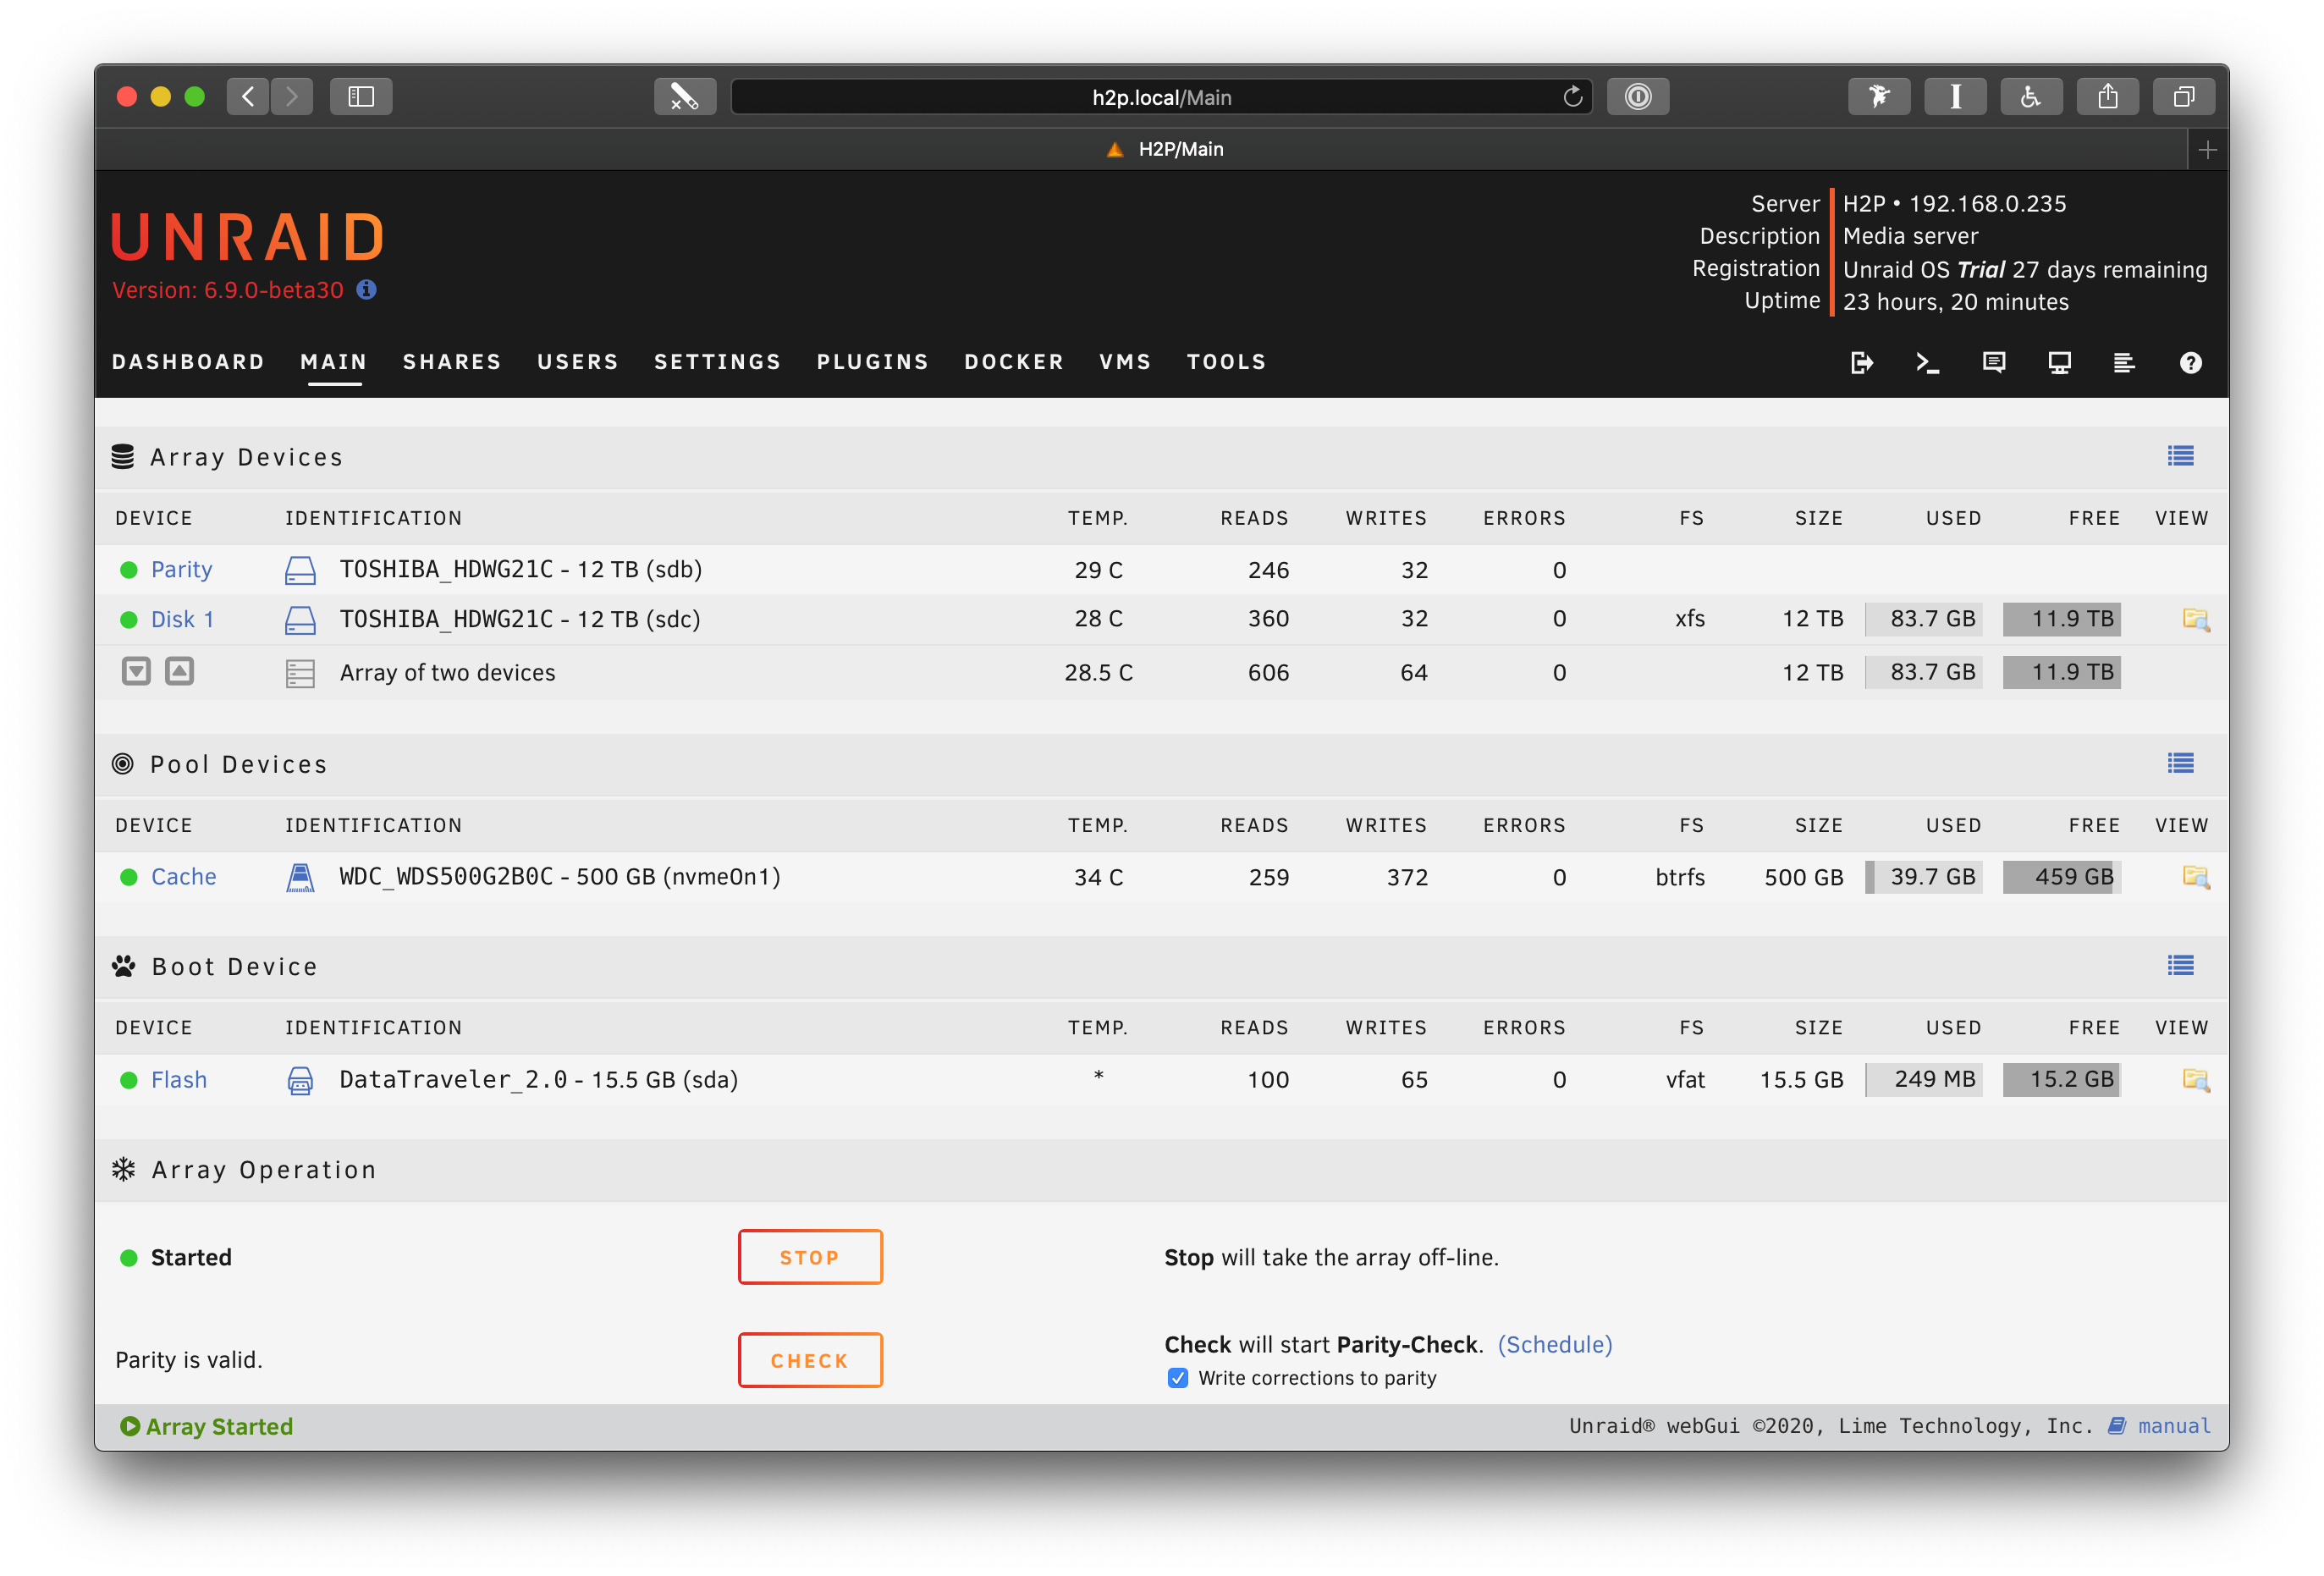
The network drivers were a semi-issue—they were not available in the stable release, but were present in a beta version, so I chose the latest beta version, and it recognized both interfaces at boot, no problems.
The 12TB drives also ran much smoother with unRAID. Even while doing the initial parity check, and during the subsequent read/write tests, it always made only as much sound as I believed was usual for a spinning rust drive.
What do you use a server for?
I will continue to try out unRAID, and probably pay the full price for it. I will also be a bit sad while doing so, thinking I could’ve saved half of its cost by not purchasing the eMMC drive in the first place, but I can always use it with a Raspberry Pi later on.
I have already installed a couple of virtual machines for development work, and am setting up my backup drives for both Time Machine and secondary document storage.
I hope to get to installing Docker apps to run some of my other apps, as well as set up some automations for AV workflows that I have, hopefully before the trial ends so that I can see its viability before I have to pay for it.
But so far, so good. It’s 3.6 liters (in volume) of geeky fun, and I can’t wait to fully use it as 1 of my 3 backup factors.
-
The system is very lightweight, requires literally less than 500MB, and after boot runs from RAM anyway, so for drives life longevity USB 2.0 drives are recommended. ↩︎